
 Kia Sportage: Headlamp and front fog lamp aiming (for Europe)
Headlamp aiming
|
Figure 1. Type A 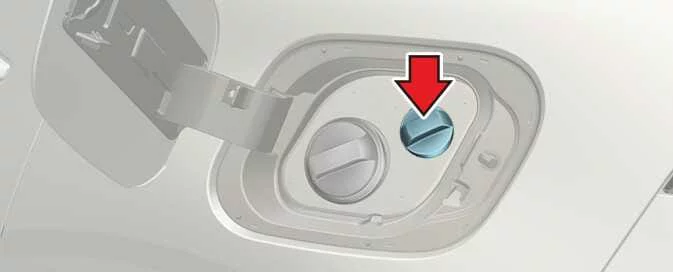
|
Figure 2. Type B 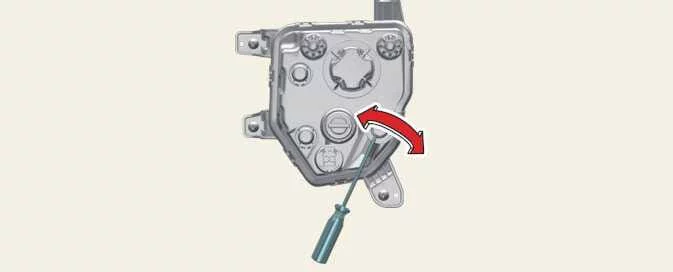
|
Procedure
-
Set the tyre pressures to the specified values. Remove all loads from the Kia Sportage except the driver, spare tyre and tools.
-
Park the vehicle on a level floor.
-
On the aiming screen, mark vertical lines through the centres of the left and right headlamps, then draw a horizontal line through their centres.
-
With the headlamps and battery in normal operating condition, aim each headlamp so its brightest area falls on the horizontal and vertical lines.
-
To adjust the low beam horizontally, turn screwdriver (1) clockwise or counterclockwise. To adjust it vertically, turn screwdriver (2) clockwise or counterclockwise.
Front fog lamp aiming
|
Figure 1. Type A 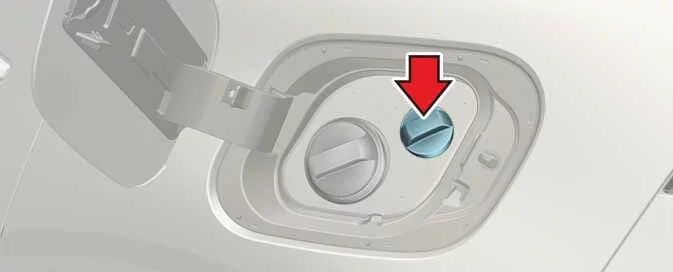
|
Figure 2. Type B 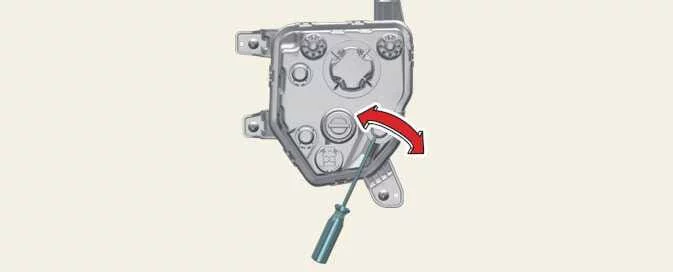
|
Aim the front fog lamps using the same general method as the headlamps. Make sure the fog lamps and battery are in normal operating condition before making an adjustment.
Procedure
-
Turn the adjustment screwdriver clockwise or counterclockwise to move the front fog lamp aim up or down.
Aiming point
A: Screen
|
Vehicle condition |
Headlamp (LED type) |
Front fog lamp (LED type, if equipped) |
|||||
|---|---|---|---|---|---|---|---|
|
Ground height |
Distance between lamps |
Ground height |
Distance between lamps |
||||
|
Low/high beam |
Low/high beam |
||||||
|
H1 |
H2 |
W1 |
W2 |
H3 |
W3 |
||
|
Without driver [mm (in)] |
Type A |
801.8 |
665.9 |
1,532 |
1,546 |
441.5 |
1037.2 |
|
Type B |
809.6 |
660.9 |
1,532 |
1,546 |
410.9 |
1298 |
|
|
With driver [mm (in)] |
Type A |
796.8 |
689.6 |
1,532 |
1,546 |
436.5 |
1,037.2 |
|
Type B |
804.6 |
684.6 |
1,532 |
1,546 |
405.9 |
1,298 |
|
Headlamp low beam (LHD vehicle)
Figure 1. Based on a 10 m screen
-
A: Vehicle axis
-
B: Vertical line through the centre of the left headlamp bulb
-
C: Vertical line through the centre of the right headlamp bulb
-
D: Horizontal line through the headlamp bulb centres
-
E: Ground
-
F: Cut-off line
Procedure
-
Switch on the low beams with no driver in the vehicle.
-
Check that the cut-off line is projected as shown in the illustration.
-
When aiming the low beams, adjust the horizontal direction before making the vertical adjustment.
-
If the vehicle has a headlamp levelling device, set its switch to position 0.
Headlamp low beam (RHD vehicle)
Figure 1. Based on a 10 m screen
-
A: Vehicle axis
-
B: Vertical line through the centre of the left headlamp bulb
-
C: Vertical line through the centre of the right headlamp bulb
-
D: Horizontal line through the headlamp bulb centres
-
E: Ground
-
F: Cut-off line
Procedure
-
Switch on the low beams with no driver in the vehicle.
-
Check that the cut-off line is projected as shown in the illustration.
-
When aiming the low beams, adjust the horizontal direction before making the vertical adjustment.
-
If the vehicle has a headlamp levelling device, set its switch to position 0.
Front fog lamp
Figure 1. Based on a 10 m screen
-
A: Vehicle axis
-
B: Vertical line through the centre of the left fog lamp bulb
-
C: Vertical line through the centre of the right fog lamp bulb
-
D: Horizontal line through the fog lamp bulb centres
-
E: Ground
-
F: Cut-off line
-
G: Upper limit
Procedure
-
Switch on the front fog lamps with no driver in the vehicle.
-
Check that the cut-off line falls within the permitted shaded area shown in the illustration.
 Replacing glove box lamp (Bulb type). Replacing luggage lamp (Bulb type)
 Appearance care
See also:
How to Register Digital Key 2 (Smartphone)
Kia Digital Key 2 works only with smartphones that support the feature. Smartphone compatibility and the digital key
service are provided by the smartphone manufacturer, and some functions may not ...
Heater & A/C Control Unit(Manual): Components and Components Location
Components
Connector Pin Function
ConnectorPin NoFunctionConnectorPin NOFunctionConnector(A)1HighConnector(B)1Tail Lamp (ILL+)2Middle High2Battery3Middle Low3Mode Actuator (VENT)4-4Mode Actuator ...
Crash Pad: Components and Components Location
Components
1. Main crash pad assembly2. Crash pad side cover [LH]3. Crash pad side cover [RH]4. Cluster fascia panel5. Reinforcing panel6. Crash pad lower panel7. Center facia panel8. Crash pad g ...
Categories
- Home
- Kia Sportage NQ5 (2022-2026) Owner's Manual
- Kia Sportage QL (2015-2019) Owner's Manual
- Kia Sportage QL (2015-2019) Service Manual
- Kia Sportage SL 2010-2016 Owner's Manual
- Kia Sportage SL 2010-2016 Service Manual
