
 Kia Sportage: Engine coolant
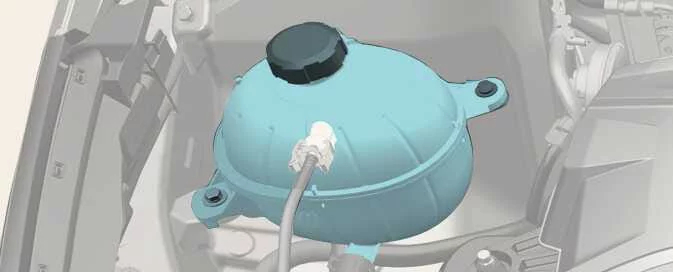
Checking coolant level
|
Inspect the cooling system and heater hoses, including their connections. Replace any hose that is swollen, worn or otherwise deteriorated.
With the engine cool, check that the coolant level in the reservoir is between the MAX and
MIN marks, also identified as F and L on some reservoirs. Check the level only after the Kia Sportage
engine has cooled.
Tip
If you need to add coolant frequently, have the cooling system inspected by a professional workshop. Kia recommends visiting an authorised Kia dealer or service partner.
Warning
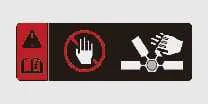 The electric cooling fan is controlled by engine coolant temperature, refrigerant pressure and vehicle speed. It may
start even when the engine is off, so take great care around the fan blades. As the coolant temperature drops, the fan
will switch off automatically; this is normal. The fan may continue to operate until the negative battery cable is
disconnected.
Caution
Removing the radiator cap
-
 Never remove the radiator cap while the engine is running or hot. Doing so can damage the cooling system or
engine, and pressurised hot coolant or steam can cause serious burns. Switch off the engine and wait for it to
cool. When the radiator is cool, use a thick towel to cover the cap and turn it counterclockwise slowly until it
reaches the first stop. Step back while pressure escapes. Once you are sure the pressure has been released, press
down on the cap through the towel and continue turning it counterclockwise to remove it. The engine and radiator
may remain hot even after the engine has stopped; never remove the cap or drain plug while they are hot.
-
If the engine has overheated because the coolant level is low, adding a large amount of coolant too quickly may crack the engine. Add coolant slowly, in small quantities, to help prevent damage.
-
Do not drive the vehicle without engine coolant. Doing so may cause the water pump to fail or the engine to seize.
Note
After topping up the coolant, make sure the cap is securely closed. A cap that is not properly fitted can allow the engine to overheat while driving.
Procedure
-
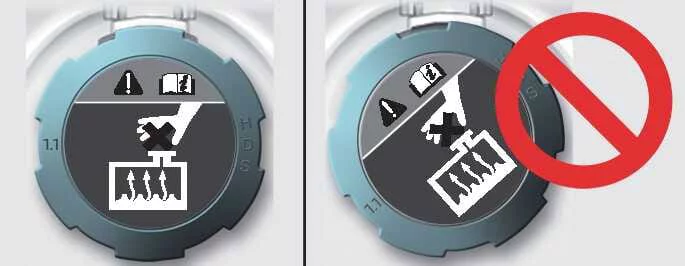
Check that the label on the radiator cap faces straight forward.
-
Check that the small projections inside the coolant cap are securely engaged.
Recommended engine coolant
-
When topping up the coolant, use only deionised or soft water. Do not mix hard water with the coolant installed at the factory.
-
Do not use alcohol- or methanol-based coolant, or mix either with the specified coolant.
-
Use a mixture containing no more than 60% antifreeze and no less than 35% antifreeze.
-
The engine contains aluminium parts and must be protected against corrosion and freezing with a phosphate-based ethylene glycol coolant.
Use the mixture ratios below as a guide for the stated ambient temperatures.
|
Ambient temperature |
Mixture percentage by volume |
|
|---|---|---|
|
Antifreeze |
Water |
|
|
-15°C (5°F) |
35% |
65% |
|
-25°C (-13°F) |
40% |
60% |
|
-35°C (-31°F) |
50% |
50% |
|
-45°C (-49°F) |
60% |
40% |
Warning
Radiator cap
-
 Do not remove the radiator cap while the engine and
radiator are hot. Pressurised, scalding coolant or steam may escape and cause serious injury.
-
Never put radiator coolant or antifreeze in the windscreen washer fluid reservoir.
-
If sprayed onto the windscreen, radiator coolant can severely reduce visibility and may cause loss of vehicle control. It can also damage the paint and body trim.
Changing coolant
Have the coolant replaced by a professional workshop in accordance with the maintenance schedule. Kia recommends visiting an authorised Kia dealer or service partner.
Caution
Before adding coolant, place a thick cloth around the radiator cap to help prevent coolant from spilling onto engine components such as the alternator.
Caution
-
Do not use radiator coolant or antifreeze in the windscreen washer fluid reservoir.
-
Radiator coolant sprayed onto the windscreen can severely obscure the driver’s view and may lead to loss of vehicle control. It can also damage the paint and body trim.
 Engine oil
 Brake/clutch fluid. Checking brake/clutch fluid level. Washer fluid. Checking washer fluid level
See also:
Instrument Cluster: Repair procedures
Removal
1.
Disconnect the negative (-) battery terminal.
2.
Remove the cluster fascia panel (A).
3.
Remove the cluster assembly (A) after loosening 4 screws.
4.
Disconnect the cluster ...
Power Window Switch: Repair procedures
Inspection
Main Power Window Switch Inspection
1.
Disconnect the negative (-) battery terminal.
2.
Remove the front door trim and power window switch.
(Refer to the BD group - "Front door") ...
Using the Smart Key (If Equipped)
Remote start button
Lock button
Unlock button
...
Categories
- Home
- Kia Sportage NQ5 (2022-2026) Owner's Manual
- Kia Sportage QL (2015-2019) Owner's Manual
- Kia Sportage QL (2015-2019) Service Manual
- Kia Sportage SL 2010-2016 Owner's Manual
- Kia Sportage SL 2010-2016 Service Manual
