 Kia Sportage: Hood: Repair procedures
Third generation SL (2010ŌĆō2016) / Kia Sportage SL Service & Repair Manual / Body (Interior and Exterior) / Exterior / Hood: Repair procedures
| Replacement |
Hood Assembly Replacement
|
| 1. |
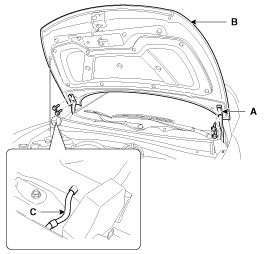
After loosening the hood hinge (A) mounting bolts, and then remove the hood (B). |
| 2. |
Remove the washer nozzle hose (C).
|
| 3. |
Installation is the reverse of removal.
|
Hood Insulator Pad Replacement
| 1. |
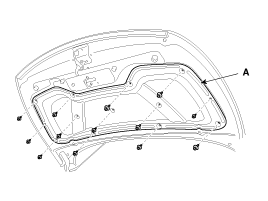
Using a clip remover detach the clips, and remove the hood insulator pad (A).
|
| 2. |
Installation is the reverse of removal.
|
Hood Seal Weatherstrip Replacement
| 1. |
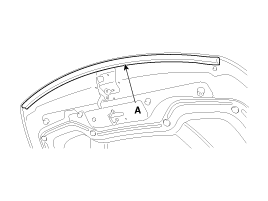
Detach the clips, then remove the hood seal weatherstrip (A).
|
| 2. |
Installation is the reverse of removal.
|
Hood Weatherstrip Replacement
| 1. |
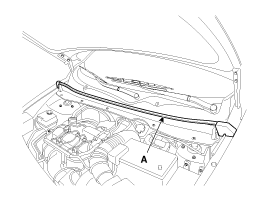
Remove the hood weatherstrip (A).
|
| 2. |
Installation is the reverse of removal. |
Hood Release Handle Replacement
| 1. |
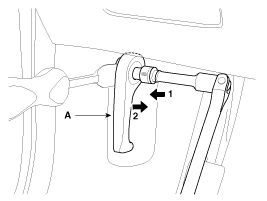
Remove the hood release handle (A).
|
| 2. |
Installation is the reverse of removal.
|
Hood Latch Replacement
| 1. |
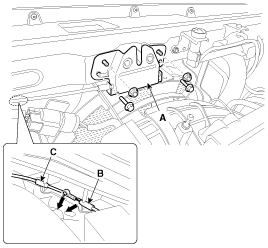
Remove the hood latch (A) mounting bolts and nuts. |
| 2. |
Disconnect the hood latch cable (B) and hood release cable (C).
|
| 3. |
Installation is the reverse of removal.
|
| Adjustment |
Hood Adjustment
| 1. |
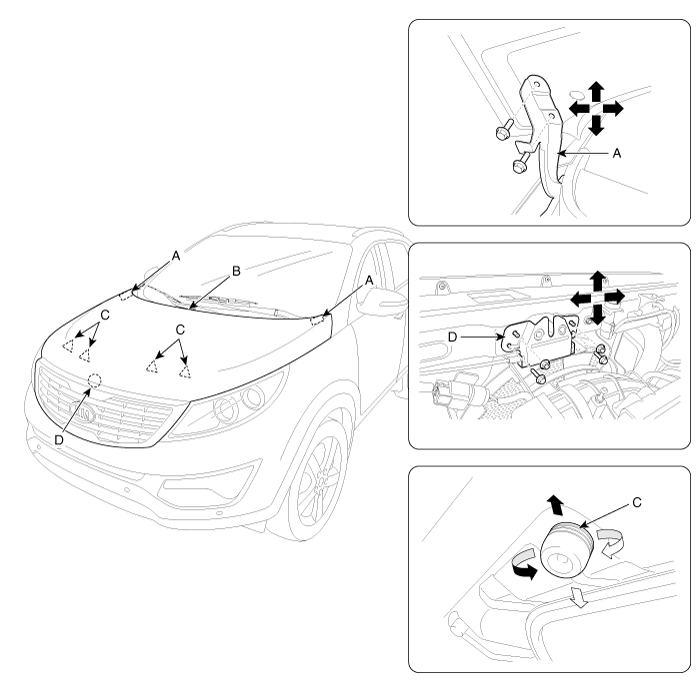
After loosening the hinge (A) mounting bolt, adjust the hood (B) by moving it up or down, or right or left. |
| 2. |
Adjust the hood height by turning the hood over slam bumpers (C). |
| 3. |
After loosening the hood latch (D) mounting bolts and nuts, adjust the latch by moving it up or down, or right or left.
|
 Fender: Repair procedures
Replacement
ŌĆó
When removing and installing the fender, an assistant is necessary.
ŌĆó
Be careful not to damage the fender and body.
ŌĆó
Whe ...
 Tail Gate: Repair procedures
Replacement
Tail Gate Trim Replacement
ŌĆó
When prying with a flat-tip screwdriver, wrap it with
protective tape, and apply protective tape around the relate ...
Other Information:
Driver Airbag (DAB) Module and Clock Spring: Components and Components Location
Components
1. Driver Airbag (DAB)2. Steering Wheel3. Clock Spring
...
Checking the amount of air conditioner refrigerant and compressor lubricant
When the amount of refrigerant is low, the performance of the air conditioning
is reduced. Overfilling also has a negative impact on the air conditioning system.
Therefore, if abnormal operation is ...
Categories
- Home
- Kia Sportage QL (2015-2019) Owners Manual
- Kia Sportage QL (2015-2019) Service Manual
- Kia Sportage SL 2010-2016 Owners Manual
- Kia Sportage SL 2010-2016 Service Manual
Copyright ® www.kispmanual.com 2014-2026


