 Kia Sportage: Alternator: Repair procedures
Third generation SL (2010ŌĆō2016) / Kia Sportage SL Service & Repair Manual / Engine Electrical System / Charging System / Alternator: Repair procedures
| Removal and Installation |
| 1. |
Disconnect the battery negative terminal first, then the positive terminal.
|
| 2. |
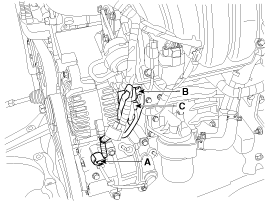
Disconnect the A/C compressor switch connector (A) the alternator connector (B), and the cable from alternator "B" terminal (C).
|
| 3. |
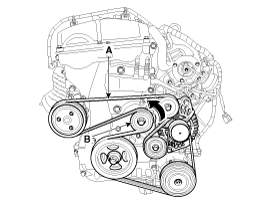
Remove the drive belt (A) after turning the drive belt tensioner (B) counterclockwise.
|
| 4. |
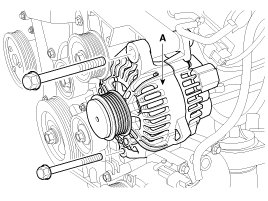
Pull out the through bolt and then remove the alternator (A).
|
| 5. |
Installation is the reverse order of removal. |
| Disassembly |
| 1. |
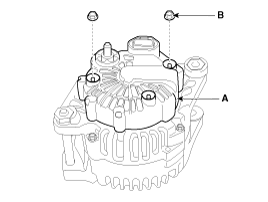
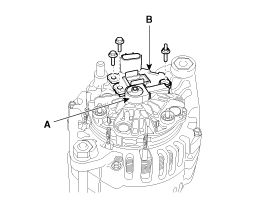
Remove the alternator cover (A) using a screw driver after loosening the nuts (B).
|
| 2. |
Remove the slip ring guide (A) and then loosen the mounting bolts and disconnect the brush holder assembly (B).
|
| 3. |
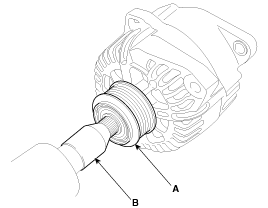
Remove the pulley (A) using the SST (09373-27000) (B).
|
| 4. |
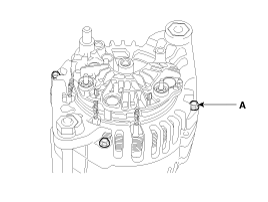
Loosen the 4 through bolts (A).
|
| 5. |
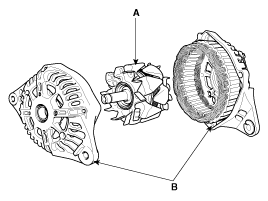
Disconnect the rotor (A) and cover (B).
|
| 6. |
Reassembly is the reverse order of disassembly. |
| Inspection |
| Inspect Rotor |
| 1. |
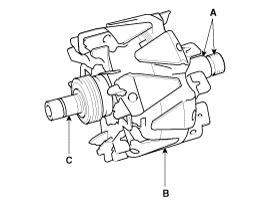
Check that there is continuity between the slip rings (C).
|
| 2. |
Check that there is no continuity between the slip rings and the rotor (B) or rotor shaft (A). |
| 3. |
If the rotor fails either continuity check, replace the alternator. |
Inspect Stator
| 1. |
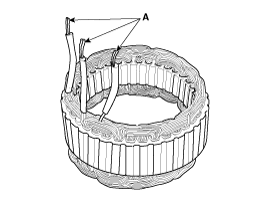
Check that there is continuity between each pair of leads (A).
|
| 2. |
Check that there is no continuity between each lead and the coil core. |
| 3. |
If the coil fails either continuity check, replace the alternator. |
 Alternator: Components and Components Location
Components
1. Pulley2. Front bracket3. Front bearing4. Rotor 5. Rear bearing 6. Rear bracket7. Through bolt8. Regulator assembly9. Regulator bolt10. Rear cover
...
 Battery: Description and Operation
Description
1.
The maintenance-free battery is, as the name implies, totally maintenance free and has no removable battery cell caps.
2.
Water never needs to be added to the maintenance-free b ...
Other Information:
AUX(Auxiliary) Jack: Schematic Diagrams
Circuit Diagram
...
Interior Trim: Repair procedures
Replacement
Door Scuff Trim Replacement
ŌĆó
Put on gloves to protect your hands.
ŌĆó
Use a plastic panel removal tool to remove interior trip pieces ...
Categories
- Home
- Kia Sportage QL (2015-2019) Owners Manual
- Kia Sportage QL (2015-2019) Service Manual
- Kia Sportage SL 2010-2016 Owners Manual
- Kia Sportage SL 2010-2016 Service Manual
Copyright ® www.kispmanual.com 2014-2026

