 Kia Sportage: Transmitter: Repair procedures
Third generation SL (2010ŌĆō2016) / Kia Sportage SL Service & Repair Manual / Body Electrical System / Keyless Entry And Burglar Alarm / Transmitter: Repair procedures
| Inspection |
| 1. |
Check that the red light flickers when the door lock or unlock button is pressed on the transmitter. |
| 2. |
Remove the battery (A) and check voltage if the red light doesn''t flicker.
|
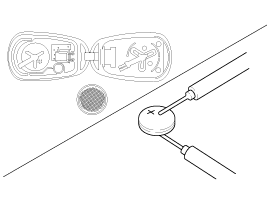
| 3. |
Insert the battery (A) into the tester (09954-2p100).
|
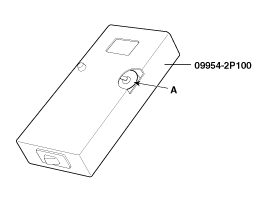
| 4. |
Push the test button and If "0.00" is displayed on screen, it means that the battery voltage is 2V or less. |
| 5. |
If "L" is displayed on screen, it means that the battery is low power and it needs to replace. |
| 6. |
To prevent the discharge of electricity, turn the tester power off. |
| 7. |
Replace the transmitter battery with a new one, if voltage is
low power then try to lock and unlock the doors with the transmitter by
pressing the lock or unlock button five or six times. |
| 8. |
If the doors lock and unlock, the transmitter is O.K, but if
the doors don''t lock and unlock, register the transmitter code, then
try to lock and unlock the doors. |
| 9. |
If the doors lock and unlock, the transmitter is O.K, but if the doors don''t lock and unlock, replace the transmitter.
|

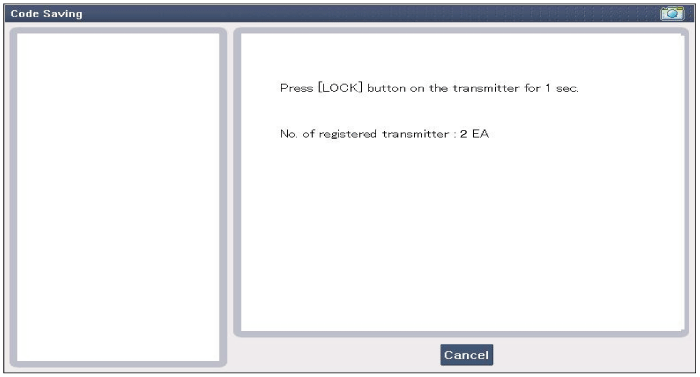
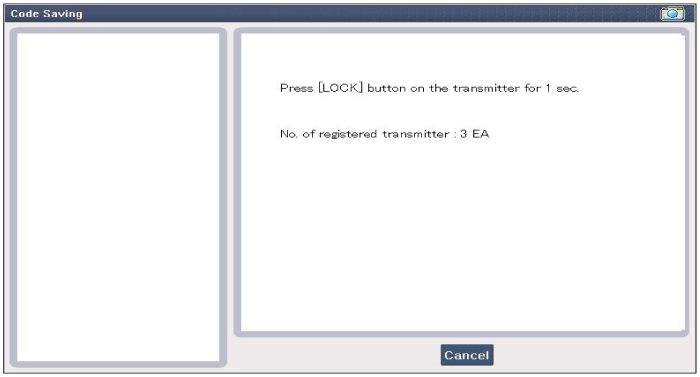
| Transmitter Code Registration (Using GDS) |
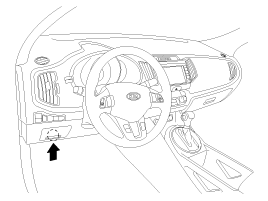
| 1. |
Connect the DLC cable of GDS to the data link connector (16 pins) in driver side crash pad lower panel, turn the power on GDS.
|
| 2. |
Select the vehicle model and then do "CODE SAVING"
|
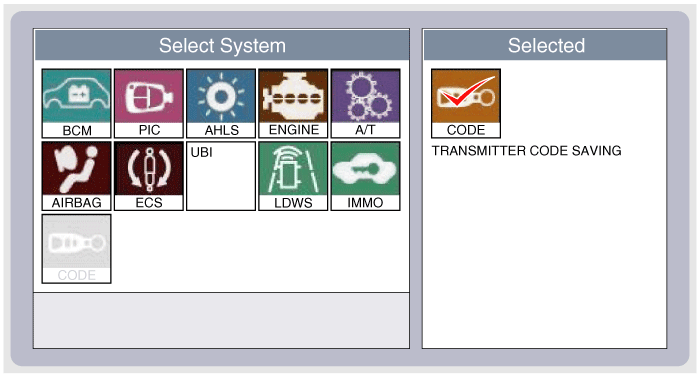
| 3. |
After selecting "CODE SAVING" menu, button "ENTER" key, then the screen will be shown as below.
|
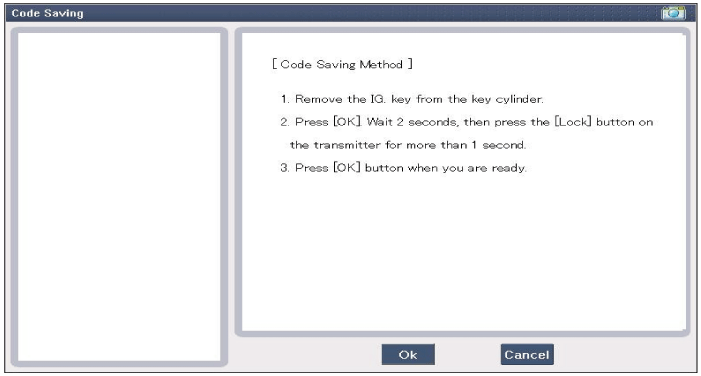
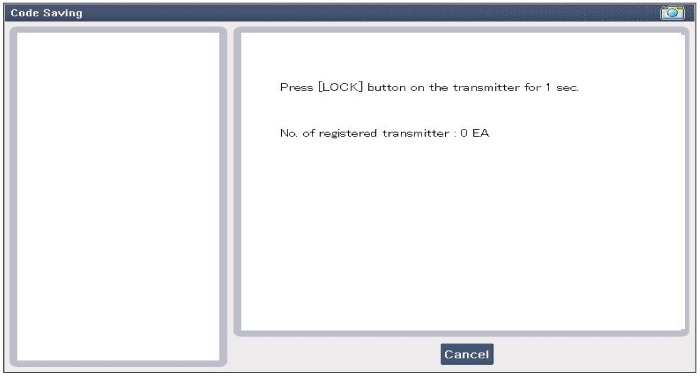
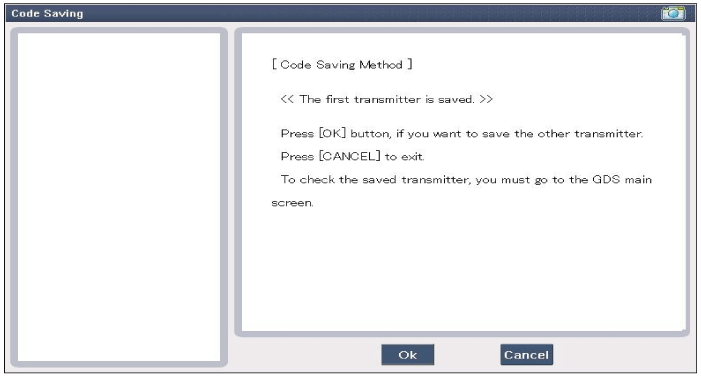
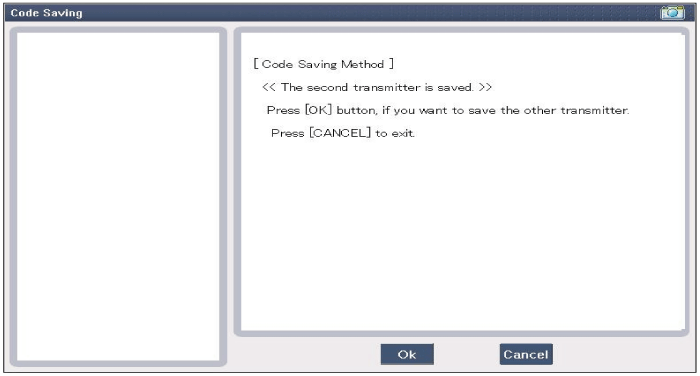
| 4. |
After removing the ignition key from key cylinder, push
"ENTER" key to proceed to the next mode for code saving. Follow steps 1
to 4 and then code saving is completed.
|


 Repair procedures
Inspection
Front Door Lock Actuator Inspection
1.
Remove the front door trim.
(Refer to the BD group - "Front door")
2.
Remove the front door module.
3.
Disconnect the 7P connector from ...

Other Information:
Components and Components Location
Components Location
1. Front axle2. Front lower arm3. Drive shaft4. Stabilizer bar5. Steering gearbox6. Sub frame7. Front strut assembly
...
Troubleshooting
TPMS Inspection method
Inspection
Find the inspection number by referring to the table above.
The following content is irrelevant of the inspection procedure.
1.
...
Categories
- Home
- Kia Sportage QL (2015-2019) Owners Manual
- Kia Sportage QL (2015-2019) Service Manual
- Kia Sportage SL 2010-2016 Owners Manual
- Kia Sportage SL 2010-2016 Service Manual

Copyright ® www.kispmanual.com 2014-2026