 Kia Sportage: Passive Occupant Detection System (PODS): Repair procedures
Third generation SL (2010ŌĆō2016) / Kia Sportage SL Service & Repair Manual / Restraint / SRSCM / Passive Occupant Detection System (PODS): Repair procedures
| Removal |
| 1. |
Disconnect the battery negative cable, and wait for at least three minutes before beginning work. |
| 2. |
Remove the front passenger seat assembly. (Refer to the Body group- Seat) |
| 3. |
Remove the seat cushion as an assembly. (Refer to the Body group- Seat) |
| Installation |
| 1. |
Install the PODS equipped seat cushion assembly. (Refer to the Body group- Seat) |
| 2. |
Install the front passenger seat assembly.
(Refer to the Body group - seat) |
| 3. |
Reconnect the battery negative cable. |
| 4. |
After installing the PODS, confirm proper system operation :
Telltale lamp will turn on for 4 seconds and be turned off
for 3 seconds. After the 7 seconds, it shall remain off if the PODS does
not require suppression and the passenger airbag is enabled.
|

| PODS Re-zero procedure |
You should perform PODS Re-zero procedure after service or replacement about all part of the passenger seat.
| 1. |
Ignition ŌĆ£OFFŌĆØ, connect GDS. |
| 2. |
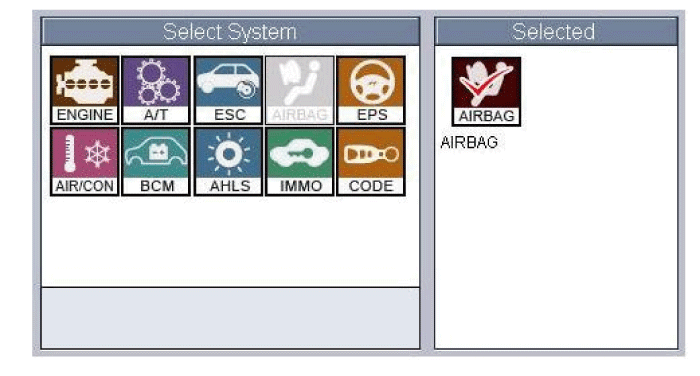
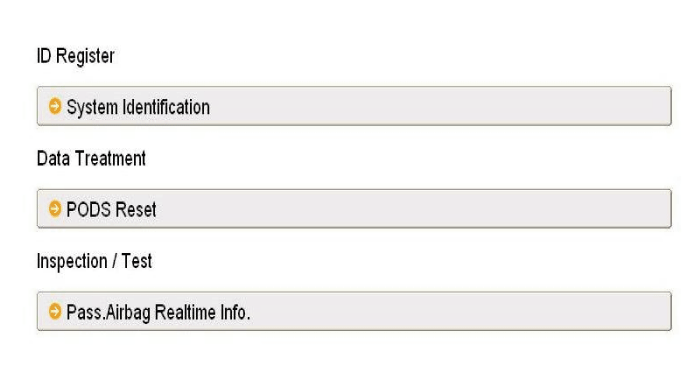
Ignition ŌĆ£ONŌĆØ & Engine ŌĆ£OFFŌĆØ, select Airbag system and ŌĆ£PODS ResetŌĆØ mode.
|
| 3. |
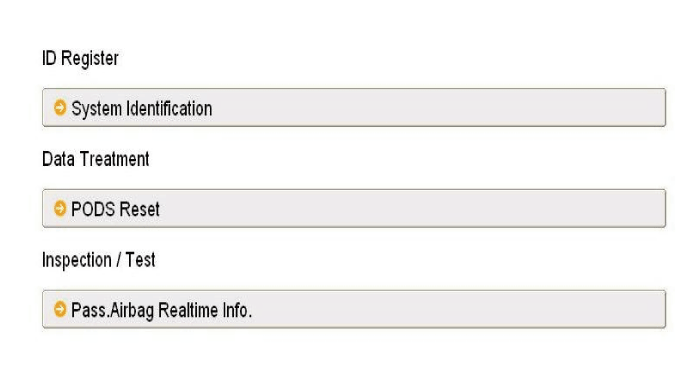
The GDS will show the two PODS RESET function steps.
|

| 4. |
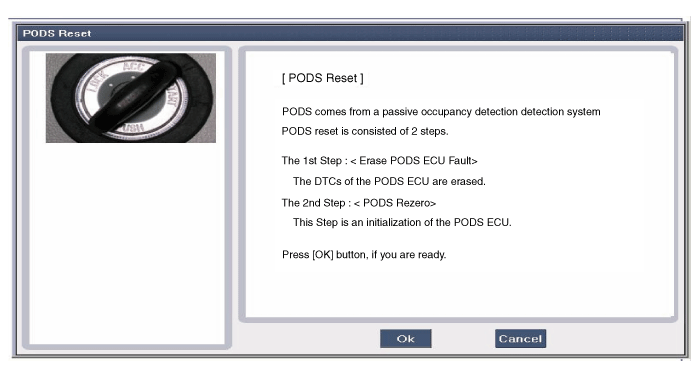
Press the OK button to erase the PODS related diagnostic codes.
|
| 5. |
Press OK button to initialize the PODS.
|
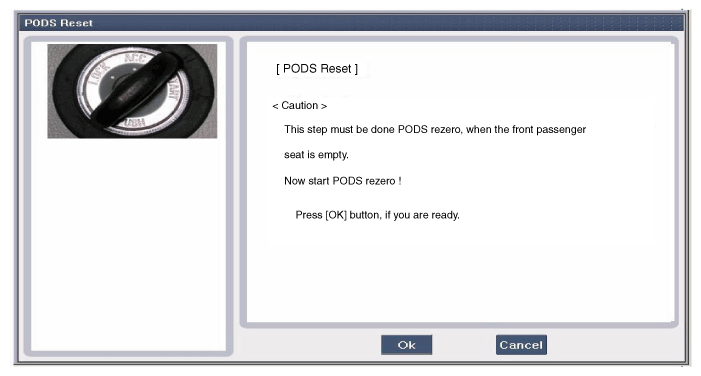
| 6. |
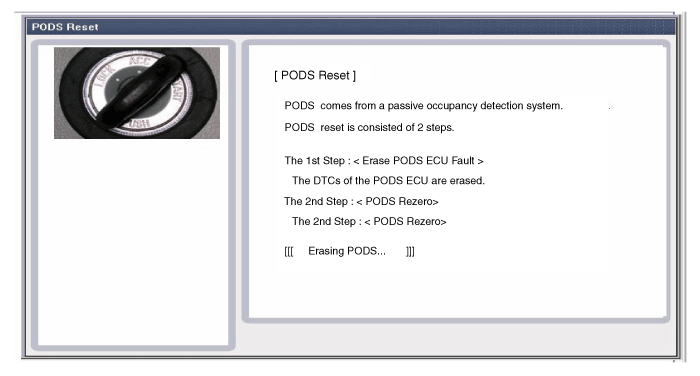
The PODS initialization procedure will be performed.
|

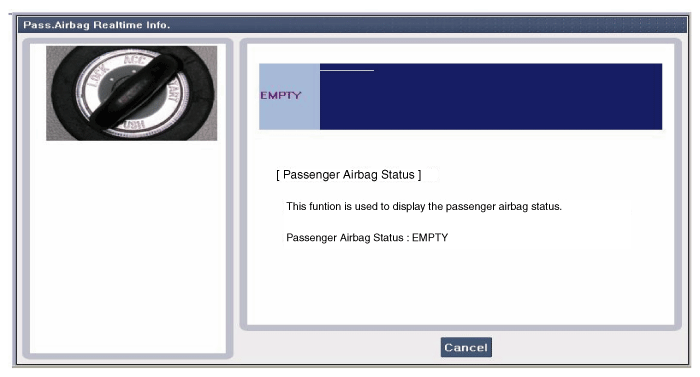
| 7. |
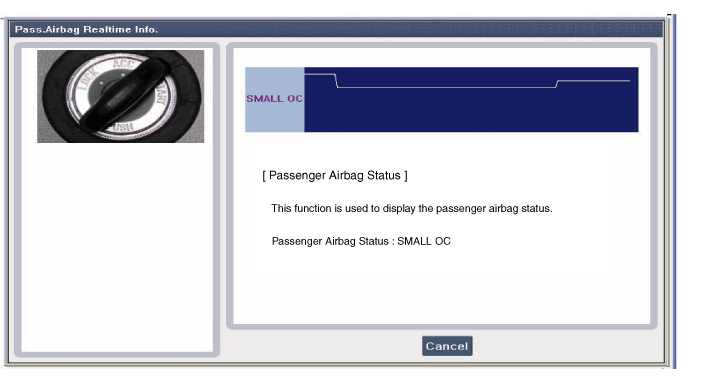
Check PODS situation with selecting " Pass. Airbag Realtime Info" after performing PODS Reset procedure.
|
| 8. |
Perform inspection with pressing OK button.
|
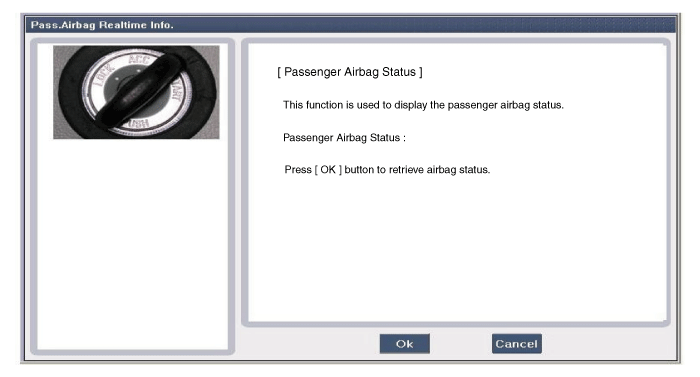
| 9. |
Finish the procedure with pressing cancel button if there is no problem after inspecting each status as below.
|

 Passive Occupant Detection System (PODS): Components and Components Location
Components
1. Sensor mat2. PODS Unit
...
 Schematic Diagrams
Circuit Diagram (1)
Circuit Diagram (2)
Harness Connector
Pin Function (Connector A)Pin Function (Connector A)1Ignition1Pressure side impact sensor [Driver] High2 -2Side impact ...
Other Information:
Rear Washer Switch: Repair procedures
Inspection
Check for continuity between the terminals while operating
the wiper and washer switch. If it is not normal condition, replace
wiper and washer switch.
Rear Wiper Switch
Rear Was ...
Oil Seal: Repair procedures
Replacement
[Right side]
1.
Remove the driveshaft assembly. (RH side)
(Refer to "Front Driveshaft" in Driveshaft and axle)
2.
Remove the dust cover (A).
3.
Remove the oil seal (A, B).
...
Categories
- Home
- Kia Sportage QL (2015-2019) Owners Manual
- Kia Sportage QL (2015-2019) Service Manual
- Kia Sportage SL 2010-2016 Owners Manual
- Kia Sportage SL 2010-2016 Service Manual

Copyright ® www.kispmanual.com 2014-2026