 Kia Sportage: Console: Repair procedures
Third generation SL (2010ŌĆō2016) / Kia Sportage SL Service & Repair Manual / Body (Interior and Exterior) / Interior / Console: Repair procedures
| Replacement |
Floor Console Replacement
| [M/T] |
|

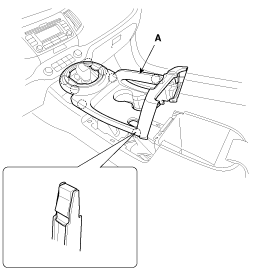
| 1. |
Using a screwdriver or remover, remove the gear boots (A).
|

| 2. |
Using a screwdriver or remover, remove the console upper cover (A).
|
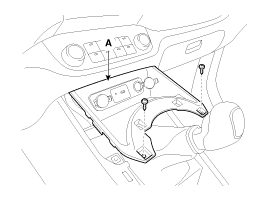
| 3. |
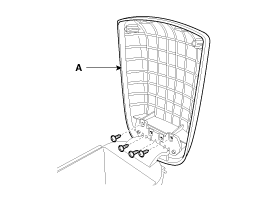
After loosening the mounting screws, then remove the floor console tray (A).
|
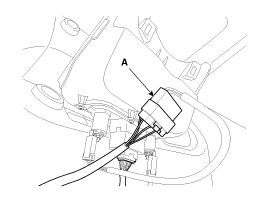
| 4. |
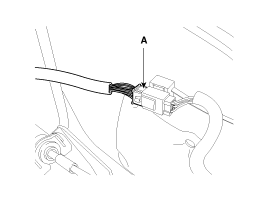
Disconnect the connector (A).
|
| 5. |
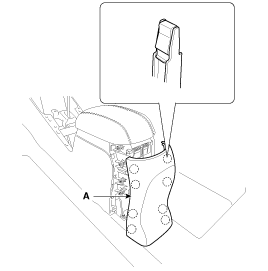
Remove the console side cover (A).
|
| 6. |
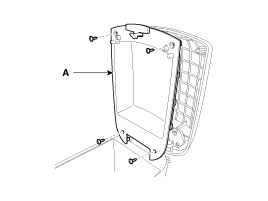
After loosening the mounting screws and bolts, then remove the floor console assembly (A).
|

| 7. |
Installation is the reverse of removal.
|

| [A/T] |
|
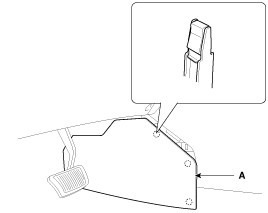
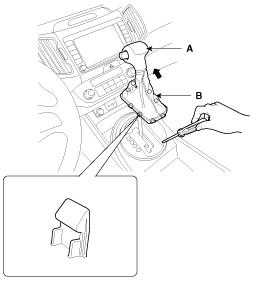
| 1. |
Using a screwdriver or remover, remove the gear boots (B) and gear knob (A).
|
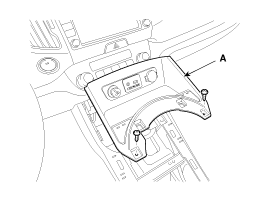
| 2. |
Using a screwdriver or remover, remove the console upper cover (A).
|

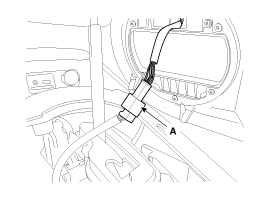
| 3. |
Disconnect the connector (A).
|
| 4. |
After loosening the mounting screws, then remove the floor console tray (A).
|
| 5. |
Disconnect the connector (A).
|
| 6. |
Remove the console side cover (A).
|
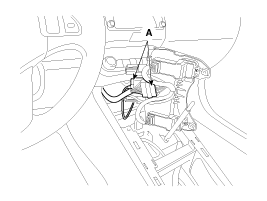
| 7. |
After loosening the mounting screws and bolts, then remove the floor console assembly (A).
|

| 8. |
Disconnect the floor console main connector (A).
|
| 9. |
Installation is the reverse of removal.
|
Armrest Replacement
|
| 1. |
Using a screwdriver or remover, remove the rear console cover (A).
|
| 2. |
After loosening the mounting screws, then remove the armrest cover (A).
|
| 3. |
After loosening the mounting screws, then remove the armrest assembly (A).
|
| 4. |
Installation is the reverse of removal.
|
 Console: Components and Components Location
Components
[ M/T]
1. Floor console assembly2. Floor console tray3. Console upper cover [5 speed M/T]4. Console upper cover [6 speed M/T]5. Console storage box mat6. Console side cover [LH]7. C ...
 Crash Pad: Components and Components Location
Components
1. Main crash pad assembly2. Crash pad side cover [LH]3. Crash pad side cover [RH]4. Cluster fascia panel5. Reinforcing panel6. Crash pad lower panel7. Center facia panel8. Crash pad g ...
Other Information:
Engine temperature gauge
This gauge shows the temperature of the engine coolant when the ignition switch
is ON.
Do not continue driving with an overheated engine. If your vehicle overheats,
refer to ŌĆ£If the engine ov ...
Specifications
Inner fuse panel
Engine compartment fuse panel
Engine compartment main fuse panel (EMS Box)
...
Categories
- Home
- Kia Sportage QL (2015-2019) Owners Manual
- Kia Sportage QL (2015-2019) Service Manual
- Kia Sportage SL 2010-2016 Owners Manual
- Kia Sportage SL 2010-2016 Service Manual

Copyright ® www.kispmanual.com 2014-2026