 Kia Sportage: Hood: Repair procedures
Third generation SL (2010ŌĆō2016) / Kia Sportage SL Service & Repair Manual / Body (Interior and Exterior) / Exterior / Hood: Repair procedures
| Replacement |
Hood Assembly Replacement
|

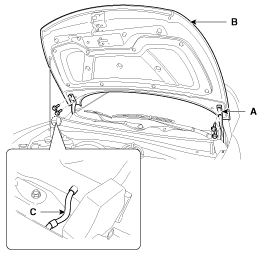
| 1. |
After loosening the hood hinge (A) mounting bolts, and then remove the hood (B). |
| 2. |
Remove the washer nozzle hose (C).
|
| 3. |
Installation is the reverse of removal.
|

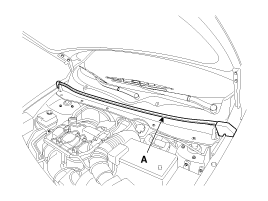
Hood Insulator Pad Replacement
| 1. |
Using a clip remover detach the clips, and remove the hood insulator pad (A).
|
| 2. |
Installation is the reverse of removal.
|
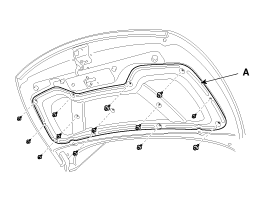
Hood Seal Weatherstrip Replacement
| 1. |
Detach the clips, then remove the hood seal weatherstrip (A).
|
| 2. |
Installation is the reverse of removal.
|
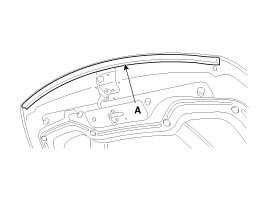
Hood Weatherstrip Replacement
| 1. |
Remove the hood weatherstrip (A).
|
| 2. |
Installation is the reverse of removal. |
Hood Release Handle Replacement
| 1. |
Remove the hood release handle (A).
|
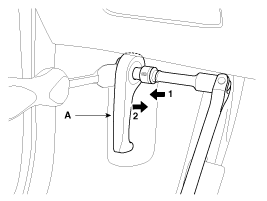
| 2. |
Installation is the reverse of removal.
|
Hood Latch Replacement
| 1. |
Remove the hood latch (A) mounting bolts and nuts. |
| 2. |
Disconnect the hood latch cable (B) and hood release cable (C).
|
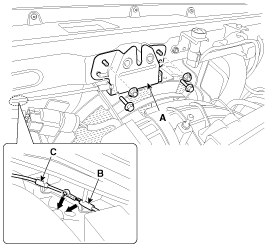
| 3. |
Installation is the reverse of removal.
|
| Adjustment |
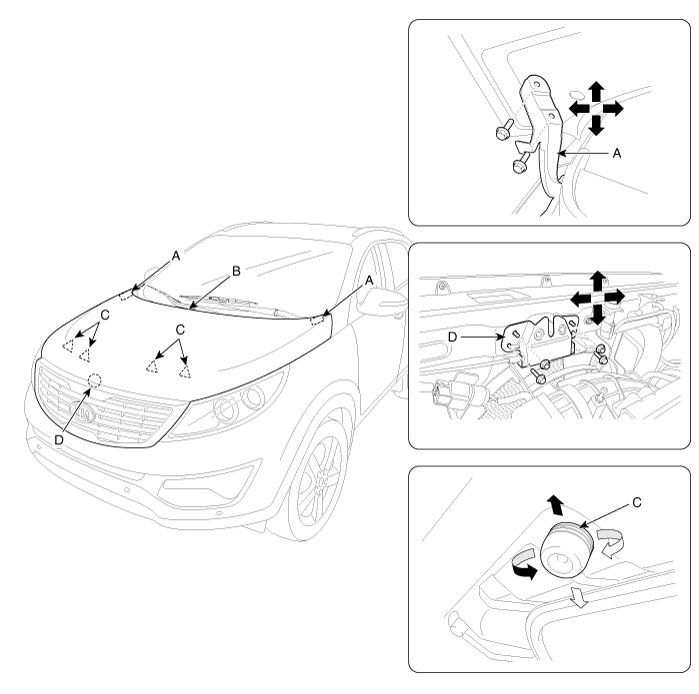
Hood Adjustment
| 1. |
After loosening the hinge (A) mounting bolt, adjust the hood (B) by moving it up or down, or right or left. |
| 2. |
Adjust the hood height by turning the hood over slam bumpers (C). |
| 3. |
After loosening the hood latch (D) mounting bolts and nuts, adjust the latch by moving it up or down, or right or left.
|
 Fender: Repair procedures
Replacement
ŌĆó
When removing and installing the fender, an assistant is necessary.
ŌĆó
Be careful not to damage the fender and body.
ŌĆó
Whe ...
 Tail Gate: Repair procedures
Replacement
Tail Gate Trim Replacement
ŌĆó
When prying with a flat-tip screwdriver, wrap it with
protective tape, and apply protective tape around the relate ...
Other Information:
Front fog light indicator
This indicator illuminates when the front fog lights are on. ...
Front headrest
The driver's and front passenger's seats are equipped with a headrest for the
occupant's safety and comfort.
The headrest not only provides comfort for the driver and front passenger, ...
Categories
- Home
- Kia Sportage QL (2015-2019) Owners Manual
- Kia Sportage QL (2015-2019) Service Manual
- Kia Sportage SL 2010-2016 Owners Manual
- Kia Sportage SL 2010-2016 Service Manual

Copyright ® www.kispmanual.com 2014-2026