Door Scuff Trim Replacement
•
Put on gloves to protect your hands.
•
Use a plastic panel removal tool to remove interior trip pieces to without marring the surface.
•
Take care not to bend or scratch the trim and panels.
1.
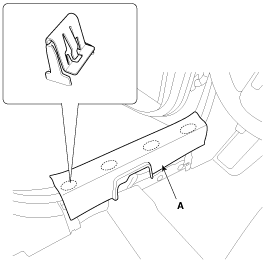
Using a screwdrier or remover, remove the front door scuff trim (A).
[Front]
2.
Remove the rear seat
(Refer to the BD group - "Rear Seat")
3.
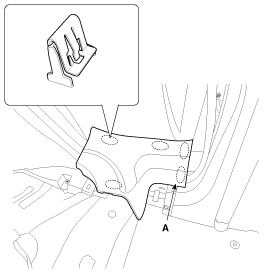
Using a screwdriver or remover, remove the rear door scuff trim (A).
[Rear]
4.
Installation is the reverse of removal.
•
Replace any damage clips.
Front Pillar Trim Replacement
•
Put on gloves to protect your hands.
•
Use a plastic panel removal tool to remove interior trip pieces to without marring the surface.
•
Take care not to bend or scratch the trim and panels.
1.
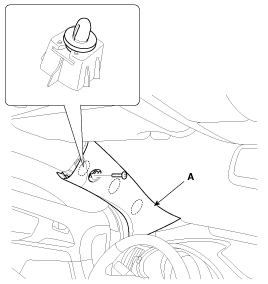
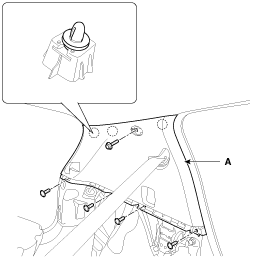
After loosening the mounting bolt, then remove the front pillar trim (A).
2.
Installation is the reverse of removal.
•
Replace any damage clips.
Cowl Side Trim Replacement
•
Put on gloves to protect your hands.
•
Use a plastic panel removal tool to remove interior trip pieces to without marring the surface.
•
Take care not to bend or scratch the trim and panels.
1.
Remove the front door scuff trim.
2.
Remove the hood release handle.
(Refer to the BD group – “Hood”)
3.
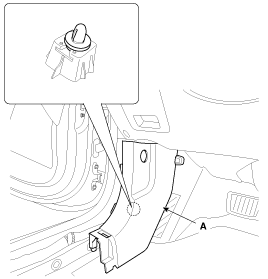
Using a screwdriver or remover, remove the cowl side trim (A).
4.
Installation is the reverse of removal.
•
Replace any damage clips.
Center Pillar Trim Replacement
•
Put on gloves to protect your hands.
•
Use a plastic panel removal tool to remove interior trip pieces to without marring the surface.
•
Take care not to bend or scratch the trim and panels.
1.
Remove the front door scuff trim and rear door scuff trim.
2.
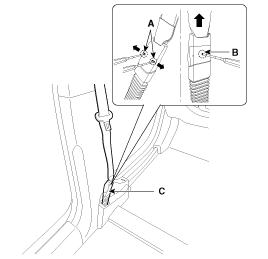
To remove the seat belt anchor pretensioner (C), keep on pushing the lock pins (A) as arrow direction.
And then remove the seat belt after pushing the lock pin (B).
3.
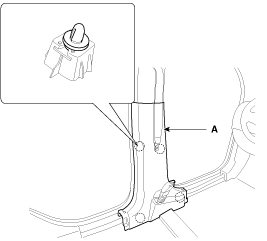
Using a screwdriver or remover, remove the center pillar lower trim (A).
4.
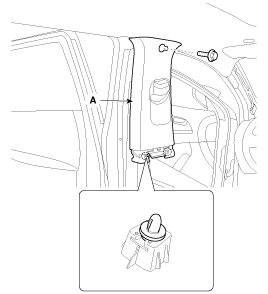
After loosening the mounting bolt, then remove the center pillar upper trim (A).
5.
Installation is the reverse of removal.
•
Replace any damage clips.
Rear Pillar Trim Replacement
•
Put on gloves to protect your hands.
•
Use a plastic panel removal tool to remove interior trip pieces to without marring the surface.
•
Take care not to bend or scratch the trim and panels.
1.
Remove the rear seat.
(Refer to the BD group – “Rear Seat”)
2.
Remove the rear door scuff trim.
3.
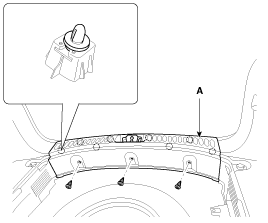
Detach the mounting clips, remove the transverse trim (A).
4.
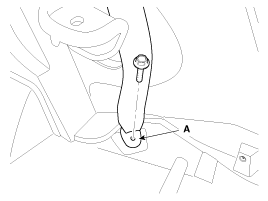
After loosening the mounting bolt, then remove the rear seat belt lower anchor (A).
Tightening torque :
39.2 ~ 53.9 N.m (4.0 ~ 5.5 kgf.m, 28.9 ~ 39.8 lb-ft)
5.
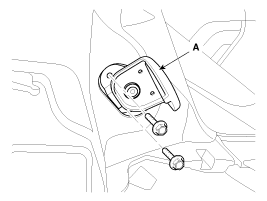
After loosening the mounting bolts, then remove the rear seat bracket (A).
6.
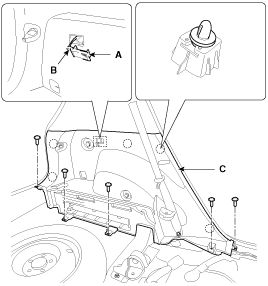
Using a screwdriver or remover, remove the lamp (A).
7.
Disconnect the connector (B).
8.
After loosening the mounting screws, then remove the luggage side trim (C).
9.
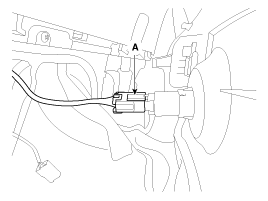
Disconnect the connector (A).
10.
After loosening the mounting screws and bolt, then remove the rear pillar trim (A).
11.
Installation is the reverse of removal.
•
Replace any damage clips.
•
Make sure the connector is connected properly.
Luggage Side Trim Replacement
•
Put on gloves to protect your hands.
•
Use a plastic panel removal tool to remove interior trip pieces to without marring the surface.
•
Take care not to bend or scratch the trim and panels.
1.
Remove the rear seat.
(Refer to the BD group – “Rear Seat”)
2.
Remove the transverse trim.
3.
Remove the rear door scuff trim.
4.
After loosening the mounting screws, then remove the luggage side trim.
5.
Installation is the reverse of removal.
•
Replace any damage clips.
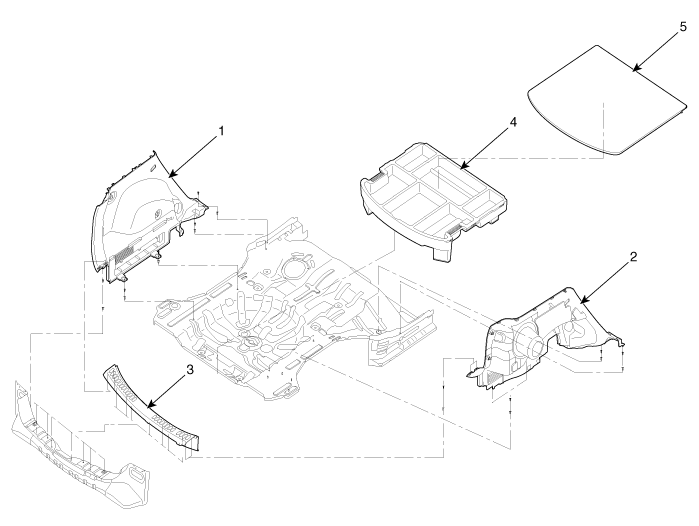
1. Luggage side trim [LH] 2. Luggage side trim [RH] 3. Rear transverse trim 4. Luggage center tray 5. Luggage covering board
Components
1. Front pillar trim2. Center pillar upper trim3. Center pillar lower trim4. Luggage side trim5. Cowl side trim6. Front door scuff trim7. Rear door scuff trim8. Front step trim9. Rear ...
Components
1. Windshield side moulding2. Windshield glass
...
 Kia Sportage: Interior Trim: Repair procedures
 Interior Trim: Components and Components Location
 Windshield Glass: Components and Components Location

