All units are filled up with coupling fluid (ultra-low
viscosity ATF) prior to shipping. Inspection, fill-up, and replacement
of coupling fluid is therefore not necessary (zero maintenance, lifetime
fluid).
Removal
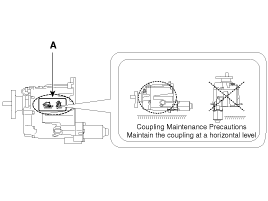
Coupling Maintenance Precautions
Maintain the coupling at a horizontal level.
ŌĆó
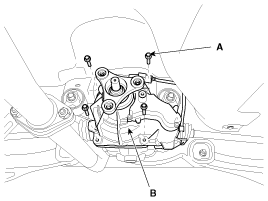
Refer to the handling caution level (A) when servicing the coupling (removal, installation, replacement, etc.).
ŌĆó
Remove the dipstick and then mount the coupling assembly to the rear differential assembly.
ŌĆó
Maintain the coupling at a horizontal level after removing the dipstick to prevent the fluid from spilling out.
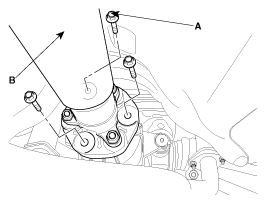
1.
Remove the 4WD coupling assembly bolts (A-3ea) mounted to the rear propeller shaft (B).
Tightening torque :
49.0~68.6N.m (5.0~7.0kgf.m, 36.2~50.6lb-ft)
2.
Using a flat tool, separate the propellar shaft from 4WD coupling assembly.
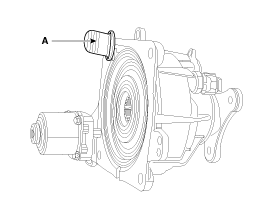
3.
Remove the electric magnetic clutch connector(A).
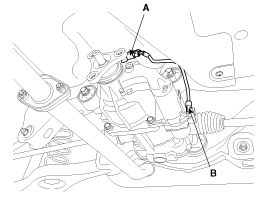
4.
Remove the 4WD coupling assembly mounting bolts (A-4ea).
Tightening torque :
58.8~63.7N.m (6.0~6.5kgf.m, 43.4~47.0lb-ft)
5.
Using a flat tool, separate the 4WD coupling assembly from the rear differential carrier assembly.
Installation
1.
Installation is the reverse of removal.
ŌĆó
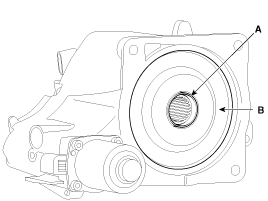
Grease the spline hole (A) of the coupling assembly.
When installation the coupling, be careful not to damage the oil seal (B).
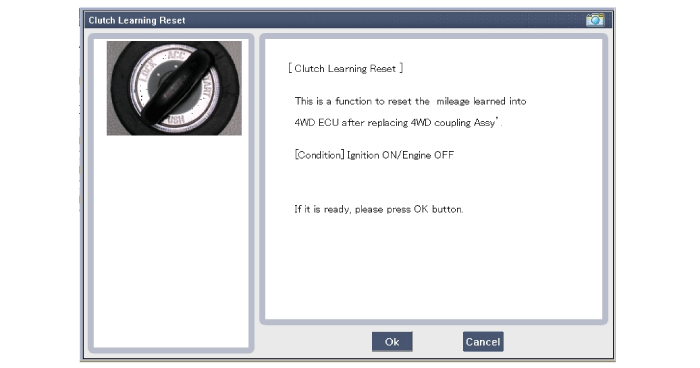
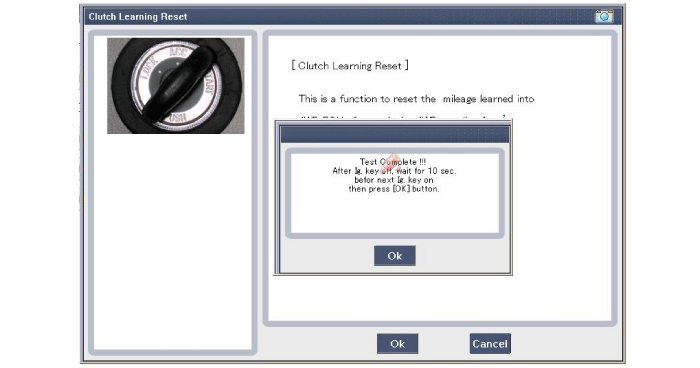
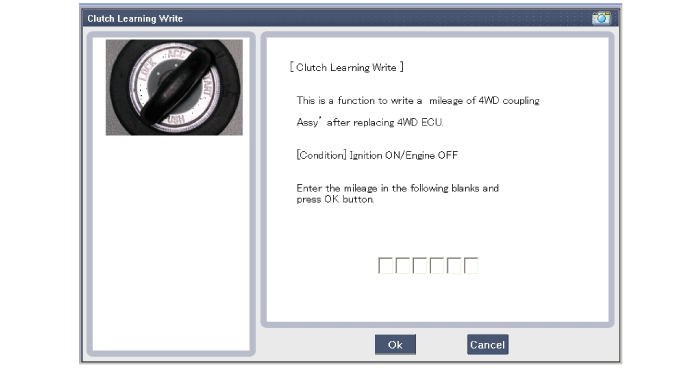
After replacing the coupling, reset the 4WD ECU''s clutch
learing using the GDS tool. (Refer to " Coupling assembly " in 4WD
group)
Adjustment
Description
The friction material inside the coupling will degrade over
time. Therefore, corresponding compensation values must be referenced
and entered after replacing the controller or the coupling.
Compensation Requirement and Procedure
1.
Simultaneous replacement of 4WD ECU (Controller) and coupling
ŌĆō
Does not require compensation.
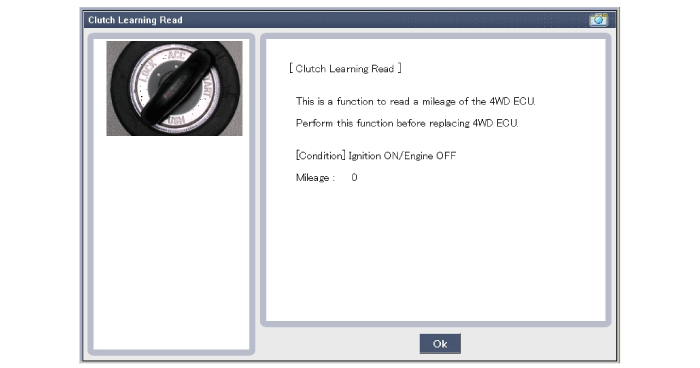
2.
Replacement of coupling only
ŌĆō
Reset the 4WD ECU''s (Controller) clutch learing.
3.
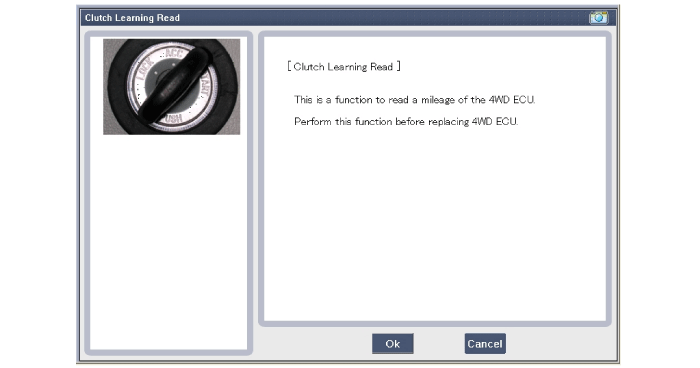
Replacement of 4WD ECU (Controller) only
ŌĆō
Before replacement: Check the ECU''s clutch learing.
ŌĆō
After replacement: Enter the original ECU''s clutch learing into the replacement ECU.
Description
The 4WD ECM controls the Pump Motor Pump (Actuator) to
generating an oil pressure. The pressure engages a multiple disk clutch
to transfer torque to the rear wheels. The torque to t ...
Other Information:
Seat Belt Pretensioner (BPT): Repair procedures
Removal
1.
Disconnect the battery negative cable, and wait for at least thirty seconds before beginning work.
2.
To remove the seat belt anchor pretensioner (C), keep on
pushing the lock pi ...
DonŌĆÖt let your parking brake freeze
Under some conditions your parking brake can freeze in the engaged position.
This is most likely to happen when there is an accumulation of snow or ice around
or near the rear brakes or if the bra ...
 Kia Sportage: Direct Electro Hydraulic Actuator Coupling: Repair procedures

 Direct Electro Hydraulic Actuator Coupling: Components and Components Location
 Oil hydraulic Motor(Actuator): Description and Operation