 Kia Sportage: Compressor: Repair procedures
Third generation SL (2010ŌĆō2016) / Kia Sportage SL Service & Repair Manual / Heating,Ventilation, Air Conditioning / Air Conditioning System / Compressor: Repair procedures
| Removal |
| 1. |
If the compressor is marginally operable, run the engine at
idle speed, and let the air conditioning work for a few minutes, then
shut the engine off. |
| 2. |
Disconnect the negative cable from the battery. |
| 3. |
Recover the refrigerant with a recovery/charging station. |
| 4. |
4. Loosen the drive belt.
(Refer to EM group - "Drive belt") |
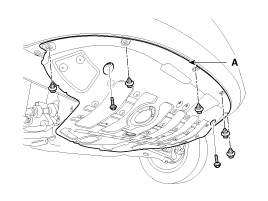
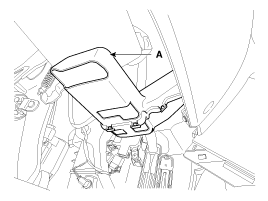
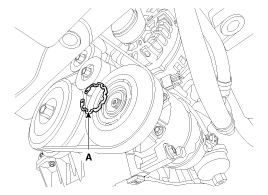
| 5. |
Loosen the mount bolts and then remove the under cover (A).
|
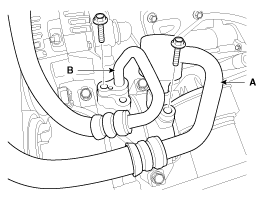
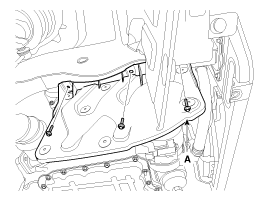
| 6. |
Remove the bolts, then disconnect the suction line (A) and
discharge line (B) from the compressor. Plug or cap the lines
immediately after disconnecting them to avoid moisture and dust
contamination.
|
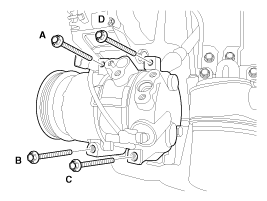
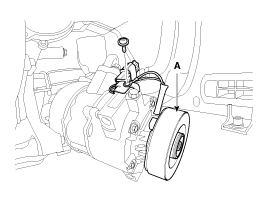
| 7. |
Disconnect the compressor clutch connector, and then remove mounting bolts and the compressor(B).
|

| Installation |
| 1. |
Make sure of the length of compressor mounting bolts, and then tighten it A>B>C>D order.
|
| 2. |
Install in the reverse order of removal, and note these items.
|
| Inspection |
Field Coil
| [Operation] |
| 1. |
Remove the compressor. |
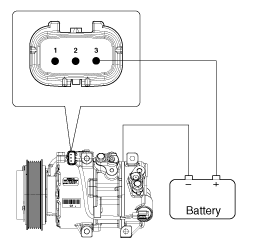
| 2. |
Check operation of the magnetic clutch. Connect the
compressor connector terminal "3" to the battery (+) terminal and the
ground battery (-) terminal to the compressor body. Check the magnetic
clutch operating noise to determine the condition.
|
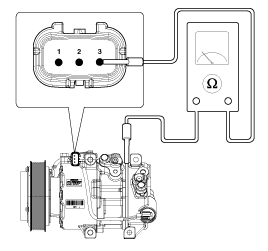
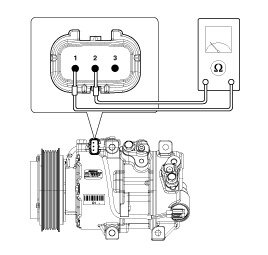
| [Resistance] |
| 1. |
Disconnect the ECV connector from the compressor. |
| 2. |
Measure resistance between compressor body and terminal "3" of the ECV connector.
|


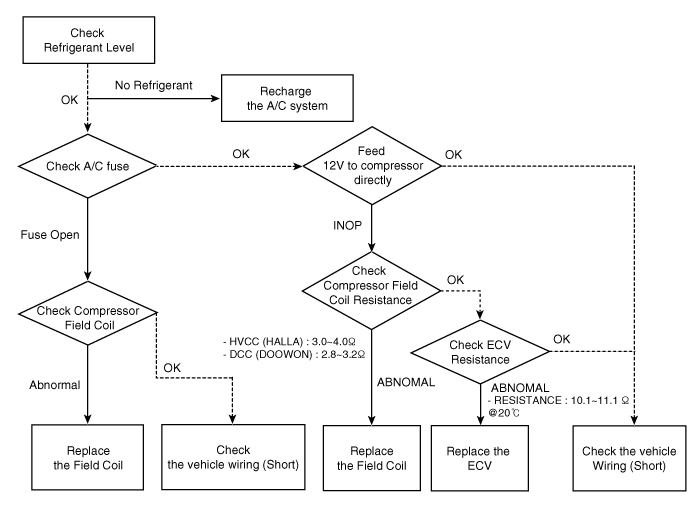
Electronic Control Valve Compressor Inspection (Tester)
| 1. |
Disconnect the ECV connector from the compressor. |
| 2. |
Measure resistance between terminal "+" and "-" of the ECV connector.
|
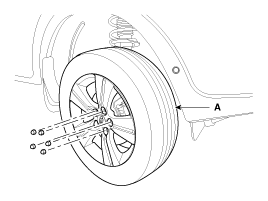
| Disassembly |
| 1. |
Remove the front left tire (A).
|
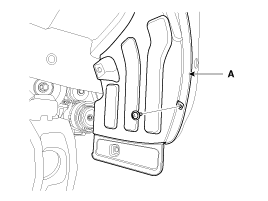
| 2. |
Loosen the mount bolts and then remove the under cover (A).
|
| 3. |
Remove the engine side cover (A).
|
| 4. |
Remove the wheel house (A).
|
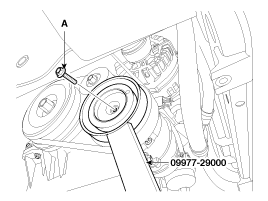
| 5. |
Remove the center bolt (A) while holding the disc & hub assembly with SST( 09977-29000).
|
| 6. |
Remove the disc & hub assembly (A).
|

| 7. |
Loosen the drive belt.
(Refer to EM group - "Drive belt") |
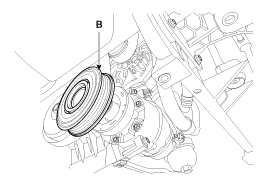
| 8. |
Disconnect the retainer ring (A) and then remove the pulley (B).
|
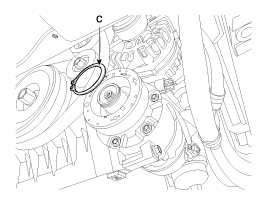
| 9. |
Remove the retainer ring (B) and then remove the field coil (C) . Be careful not to damage the coil and compressor.
|
| 10. |
To prepare work space, loosen the compressor mounting bolts. |
| 11. |
Disconnect the connector and ground screw and than remove the field coil (A).
|
| 12. |
Reassemble the compressor clutch in the reverse order of disassembly, and note these items :
|
 Compressor: Components and Components Location
Components
1. Bolt2. Disc & Hub Assembly 3. Retainer Ring (Pulley)4. Pulley5. Retainer Ring (Field coil)6. Field Coil7. Compressor Assembly
...
 Condenser: Components and Components Location
Component Location
...
Other Information:
Schematic Diagrams
Circuit Diagram
...
Front Stabilizer Bar: Components and Components Location
Components
1. Stabilizer bar2. Stabilizer link3. Sub frame
...
Categories
- Home
- Kia Sportage QL (2015-2019) Owners Manual
- Kia Sportage QL (2015-2019) Service Manual
- Kia Sportage SL 2010-2016 Owners Manual
- Kia Sportage SL 2010-2016 Service Manual

Copyright ® www.kispmanual.com 2014-2026