
 Kia Sportage: Automatic Transaxle: Repair procedures
Third generation SL (2010–2016) / Kia Sportage SL Service & Repair Manual / Automatic Transaxle System / Automatic Transaxle System / Automatic Transaxle: Repair procedures
| Removal |
| 1. |
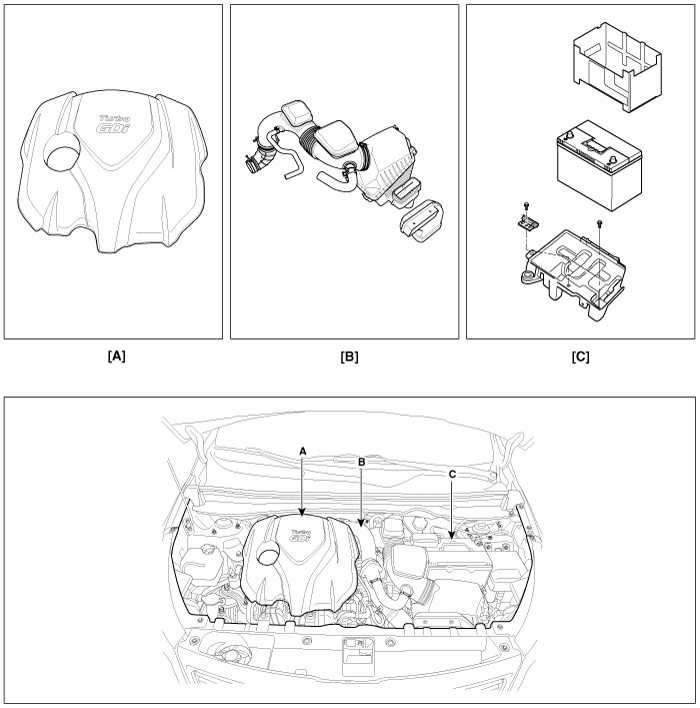
Remove the following items;
|
| 2. |
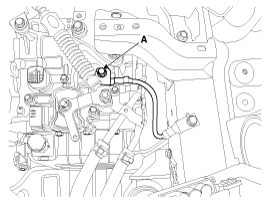
Remove the ground line after removing the bolt (A).
|
| 3. |
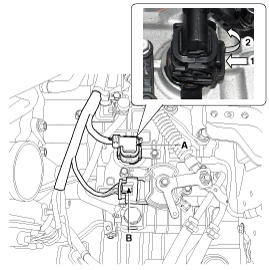
Disconnect the solenoid valve connector (A) and inhibitor switch connector (B).
|
| 4. |
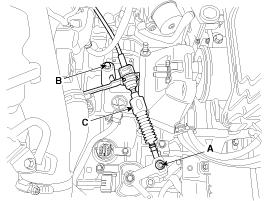
Remove the control cable (C) after removing the nut (A) and the bolt (B).
|
| 5. |
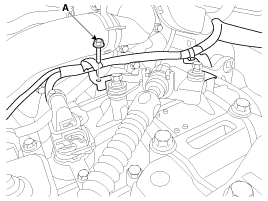
Remove the solenoid valve connector and inhibitor switch connector wiring mounting bracket (A).
|
| 6. |
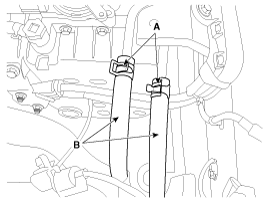
Disconnect the hose (B) after removing the automatic transaxle fluid cooler hose clamp (A).
|
| 7. |
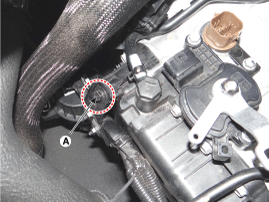
Remove the wiring bracket installation bolt (A).
|
| 8. |
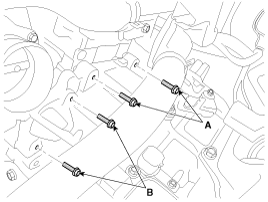
Remove the automatic transaxle upper mounting bolt (A-2ea) and the starter motor mounting bolt (B-2ea).
|
| 9. |
Remove the cowl top cover.
(Refer to "Interior(cowl top cover)" in BD group.) |
| 10. |
Remove the wiper motor.
(Refer to "Windshield Wiper motor" in BE group.) |
| 11. |
Remove the cowl complete assembly panel (A).
|
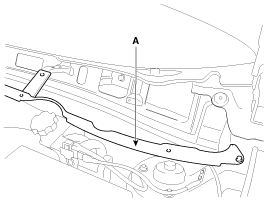
| 12. |
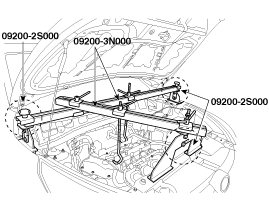
Using the engine support fixture (Support SST No.:
09200-2S000, Bar SST No.: 09200-3N000), hold the engine and transaxle
assembly safely.
(Refer to " Engine support fixture special tool assembly drawing" in General Information of this group)
|
| 13. |
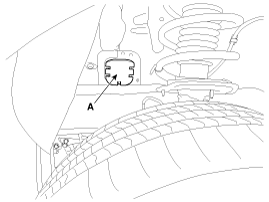
Remove the cover (A).
|
| 14. |
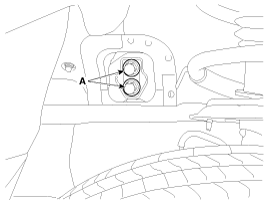
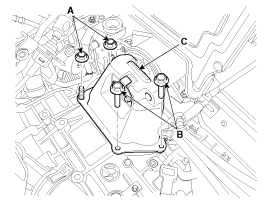
Remove the transaxle mounting bracket bolts (A).
|
| 15. |
Remove the transaxle mounting support bracket (C).
|
| 16. |
Lift the vehicle with a jack. |
| 17. |
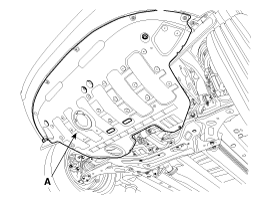
Remove the under cover (A).
|
| 18. |
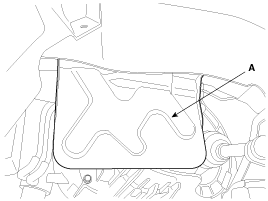
Remove the side cover (A).
|
| 19. |
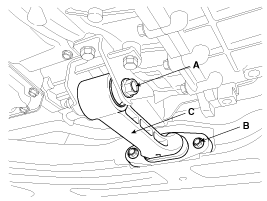
Remove the roll rod bracket (C) after removing bolt (A,B).
|
| 20. |
Remove the vaccum pump (A).
|
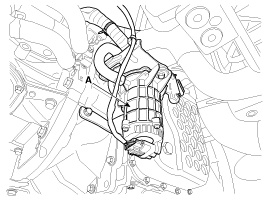
| 21. |
Remove the following items;
2WD
4WD
|
| 22. |
Remove the dust cover (A).
|
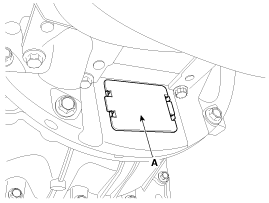
| 23. |
Remove the torque converter mounting bolt (A-6ea) with rotating the crankshaft.
|
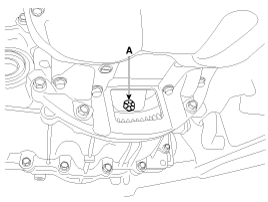
| 24. |
Remove the automatic transaxle with a jack after removing the mounting bolt (A-4ea, B-2ea).
|
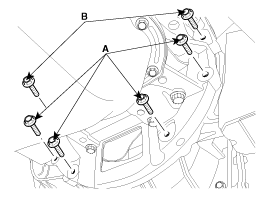
| Installation |
| 1. |
Install in the reverse order of removal.
|

 Automatic Transaxle: Components and Components Location
Components Location
1. Converter housing2. Automatic transaxle case3. Rear cover4. Valve body cover5. Manual control lever6. Air breather hose7. Inhibitor switch8. Solenoid valve connector
...
 Hydraulic System
...
Other Information:
Transmitter precautions
The transmitter will not work if any of the following occurs:
The ignition key is in the ignition switch.
You exceed the operating distance limit (10 m [about 30 feet]).
The battery in the tra ...
Checking tire inflation pressure
Check your tires once a month or more.
Also, check the tire pressure of the spare tire.
How to check
Use a good quality gauge to check tire pressure. You can not tell if your tires
are properly i ...
Categories
- Home
- Kia Sportage QL (2015-2019) Owners Manual
- Kia Sportage QL (2015-2019) Service Manual
- Kia Sportage SL 2010-2016 Owners Manual
- Kia Sportage SL 2010-2016 Service Manual

Copyright © www.kispmanual.com 2014-2026