 Kia Sportage: Torque Converter Control Solenoid Valve (T/CON_VFS): Repair procedures
Third generation SL (2010ŌĆō2016) / Kia Sportage SL Service & Repair Manual / Automatic Transaxle System / Automatic Transaxle Control System / Torque Converter Control Solenoid Valve (T/CON_VFS): Repair procedures
| Inspection |
| 1. |
Turn ignition switch OFF. |
| 2. |
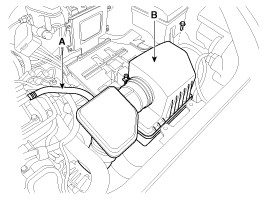
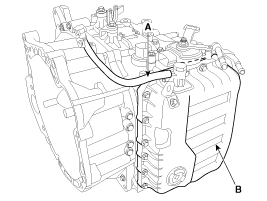
Remove the air duct (A).
|

| 3. |
Remove the air cleaner assembly.
|
| 4. |
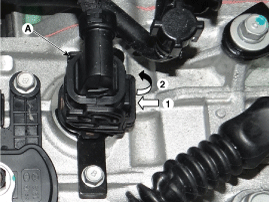
Disconnect the solenoid valve connector (A).
|
| 5. |
Measure resistance between sensor signal terminal and ground terminal. |
| 6. |
Check that the resistance is within the specification. |
| Removal |
| 1. |
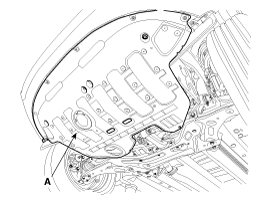
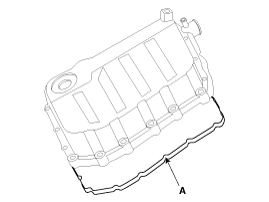
Remove the under cover (A).
|
| 2. |
Remove the drain plug (A) and drain the ATF totally and then reinstall the drain plug.
|


| 3. |
Remove the air duct (A).
|
| 4. |
Remove the air cleaner assembly.
|
| 5. |
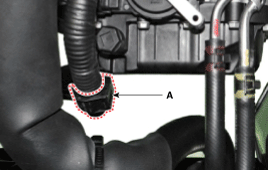
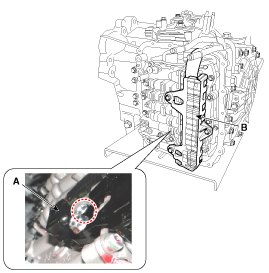
Disconnect the clip (A) from the valve body cover.
|
| 6. |
Remove the air breather hose (A). |
| 7. |
Remove t he valve body cover (B).
|
| 8. |
Remove the solenoid valve connector (B) and the oil temperature sensor (A).
|
| 9. |
Remove the solenoid valve support bracket (B) and the valve body mounting bolt (A-1ea).
|

| 10. |
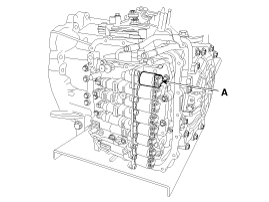
Remove the torque converter control solenoid valve (A).
|
| Installation |
| 1. |
Install in the reverse order of removal.
|
 Torque Converter Control Solenoid Valve (T/CON_VFS): Schematic Diagrams
Circuit Diagram
...
 26 Brake Control Solenoid Valve(26/B_VFS): Description and Operation
Description
26Brake control solenoid valve(26/B) is attached to the valve
body. This variable force solenoid valve directly controls the
hydraulic pressure inside the 26Brake. ...
Other Information:
High beam operation
To turn on the high beam headlights, push the lever away from you. Pull it back
for low beams.
The high beam indicator will light when the headlight high beams are switched
on.
To prevent the ...
Air conditioning
Press the A/C button to turn the air conditioning system on (indicator light
will illuminate). Press the button again to turn the air conditioning system off. ...
Categories
- Home
- Kia Sportage QL (2015-2019) Owners Manual
- Kia Sportage QL (2015-2019) Service Manual
- Kia Sportage SL 2010-2016 Owners Manual
- Kia Sportage SL 2010-2016 Service Manual

Copyright ® www.kispmanual.com 2014-2026