 Kia Sportage: Heater Unit: Repair procedures
Third generation SL (2010ŌĆō2016) / Kia Sportage SL Service & Repair Manual / Heating,Ventilation, Air Conditioning / Heater / Heater Unit: Repair procedures
| Replacement |
| 1. |
Disconnect the negative (-) battery terminal. |
| 2. |
Recover the refrigerant with a recovery/ recycling/ charging station. |
| 3. |
When the engine is cool, drain the engine coolant from the radiator. |
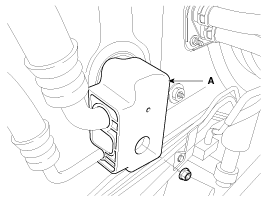
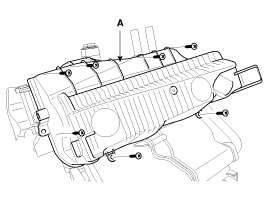
| 4. |
Remove the expansion valve cover (A).
|
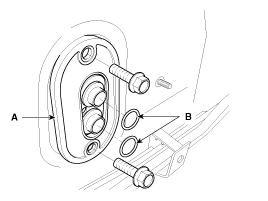
| 5. |
Remove the bolts (A) and the expansion valve (B) from the evaporator core.
|

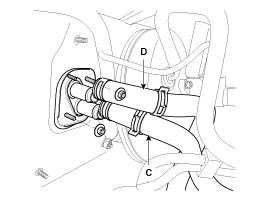
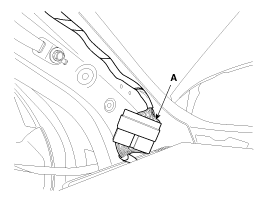
| 6. |
Remove the expansion valve flange (A).
|
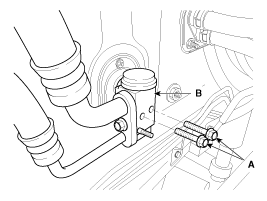
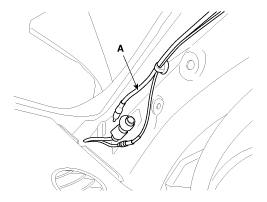
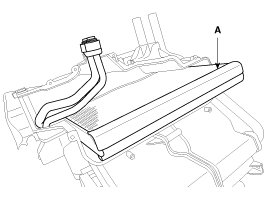
| 7. |
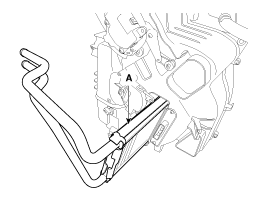
Disconnect the inlet (C) and outlet (D) heater hoses from the heater unit.
|
| 8. |
Remove the cowl top cover.
(Refer to BD group - "Cowl Top Cover"). |
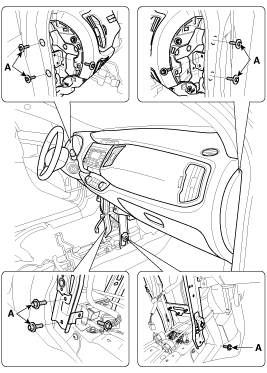
| 9. |
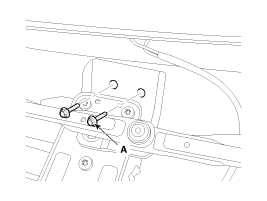
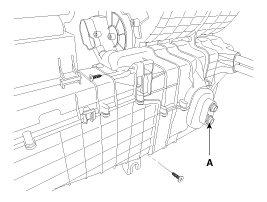
Loosen the cowl cross member mounting bolts (A).
|
| 10. |
Remove the steering handle and column.
(Refer to ST group - "Steering Column") |
| 11. |
Remove the center console.
(Refer to BD group - "Center Console") |
| 12. |
Disconnect the airbag connector (A).
|
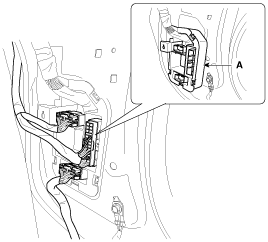
| 13. |
Disconnect the connectors and then remove the left & right multi box (A).
|
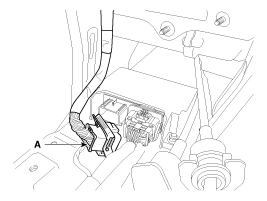
| 14. |
Remove the left & right filler trim and than disconnect the connector (A).
|
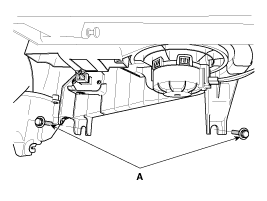
| 15. |
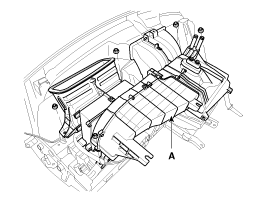
Remove the heater & blower unit after loosening mounting bolts (A).
|
| 16. |
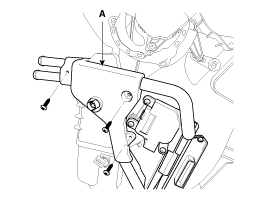
Loosen the cowl cross member mounting bolts (A) and then remove the crash pad and heater blower unit.
|
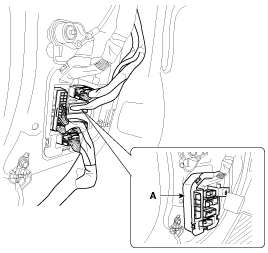
| 17. |
Disconnect the connectors and then remove the heater blower unit (A) from crash pad.
|
| 18. |
Remove the blower unit (A) from heater unit (B) after loosening screws.
|

| 19. |
Loosen the mounting screw and then remove the heater core cover (A).
|
| 20. |
Disconnect the heater core (A) from heater unit.
|
| 21. |
Loosen the heater unit lower case mount screw and then remove the heater unit lower case (A).
|
| 22. |
Remove the evaporator core (A).
|
| 23. |
Be careful that the inlet and outlet pipe are not bent during heater core removal, and pull out the heater core. |
| 24. |
Installation is the reverse order of removal. |
| 25. |
Installation is the reverse order of removal, and note these items :
|
 Heater Unit: Components and Components Location
Component Location
Components
1. Heater Case (LH)2. Heater Case (RH)3. Heater Lower Case4. Separator5. Shower Duct6. Heater Core7. Evaporator Core8. Evaporator Sensor9. Vent Door10. Vent Door11. ...
 Temperature Control Actuator: Components and Components Location
Component Location
...
Other Information:
Refrigerant line: Repair procedures
Replacement
1.
Discharge refrigerant from refrigeration system.
2.
Replace faulty tube or hose.
Cap the open fittings immediately to keep moisture or dirt out of ...
Front Seat: Components and Components Location
Components
1. Headrest2. Headrest guide3. Front seat back cover4. Front seat back heater5. Front seat back pad6. Front seat back power lumbar7. Front seat back duct8. Front seat back frame9. Fron ...
Categories
- Home
- Kia Sportage QL (2015-2019) Owners Manual
- Kia Sportage QL (2015-2019) Service Manual
- Kia Sportage SL 2010-2016 Owners Manual
- Kia Sportage SL 2010-2016 Service Manual

Copyright ® www.kispmanual.com 2014-2026