 Kia Sportage: Antenna: Repair procedures
Third generation SL (2010Ц2016) / Kia Sportage SL Service & Repair Manual / Body Electrical System / Audio / Antenna: Repair procedures
| Inspection |
Antenna Cable
| 1. |
Remove the antenna jack from the audio unit and antenna. |
| 2. |
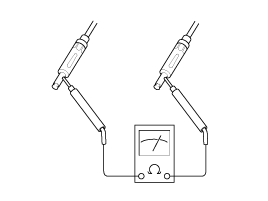
Check for continuity between the center poles of antenna cable.
|
| 3. |
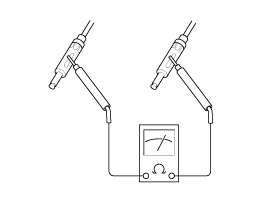
Check for continuity between the outer poles of antenna cable. There should be continuity.
|
| 4. |
If there is no continuity, replace the antenna cable. |
| 5. |
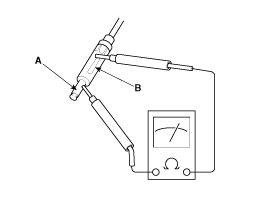
Check for continuity between the center pole (A) and outer pole (B) of antenna cable. There should be no continuity.
|
| 6. |
If there is continuity, replace the antenna cable. |
| Removal |
Roof Antenna
| 1. |
Remove the rear roof trim.
(Refer to the BD group - "Roof trim") |
| 2. |
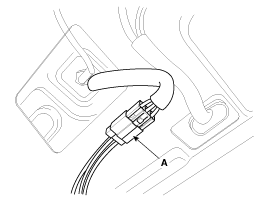
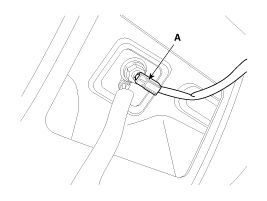
Disconnect the roof antenna feeder cable and connector (A) from the roof antenna.
|
| 3. |
Disconnect the antenna power cable (A).
|
| 4. |
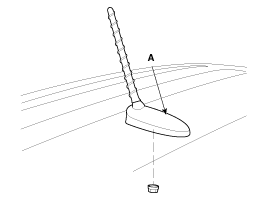
Remove the roof antenna (A) after removing a nut.
|
| Installation |
| 1. |
Install the roof antenna to the roof panel.
|
| 2. |
Connect the feeder cable to the antenna. |
| 3. |
Connect the power cable to the antenna. |
| 4. |
Install the rear roof trim.
|
 Speakers: Repair procedures
Inspection
1.
Troubleshooting for Speaker
(1)
Basic inspection of speaker
Inspect the sound from speaker after verifying that the
speaker mounting screws are removed and the wiring connector ...
 Audio Remote Control: Components and Components Location
Component Location
1. Audio remote control switch (Left)2. Audio remote control switch (Right)3. Bluetooth switch4. Voice switch5. Audio remote control switch6. Cruise remote control switch
...
Other Information:
OFF
Х With automatic transaxle
To turn off the engine (START/RUN position) or vehicle power (ON position), press
the ENGINE START/STOP button with the shift lever in the P (Park) position. When
you ...
CVVT Oil Temperature Sensor (OTS): Repair procedures
Inspection
1.
Turn the ignition switch OFF.
2.
Disconnect the OTS connector.
3.
Remove the OTS.
4.
After immersing the thermistor of the sensor into engine coolant, measure resistance ...
Categories
- Home
- Kia Sportage QL (2015-2019) Owners Manual
- Kia Sportage QL (2015-2019) Service Manual
- Kia Sportage SL 2010-2016 Owners Manual
- Kia Sportage SL 2010-2016 Service Manual
Copyright © www.kispmanual.com 2014-2024

