
 Kia Sportage: Audio Unit: Repair procedures
Third generation SL (2010–2016) / Kia Sportage SL Service & Repair Manual / Body Electrical System / Audio / Audio Unit: Repair procedures
| Removal |
| 1. |
Disconnect the negative (-) battery terminal. |
| 2. |
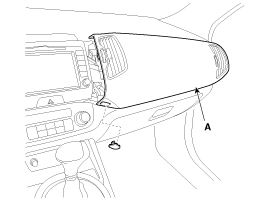
Remove the crash pad passenger''s garnish (A).
(Refer to BD group - "Crash pad")
|
| 3. |
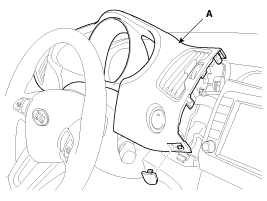
Disconnect the connectors and remove the cluster fascia panel (A).
(Refer to BD group - "Crash pad")
|
| 4. |
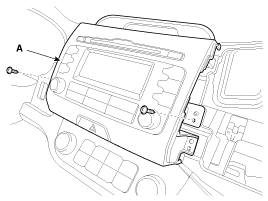
Remove the center fascia panel (A) after loosening the mounting screw (2EA).
|
| 5. |
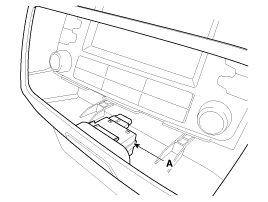
Disconnect the connector (A) installed on the center fascia panel.
|
| 6. |
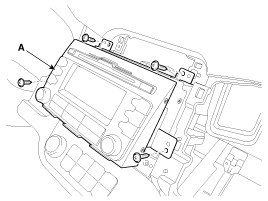
Remove the audio assembly (A) after loosening the mounting screw (4EA).
|
| 7. |
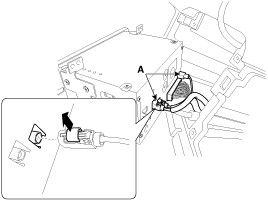
Disconnect the audio connectors and cable (A), then remove the audio unit completely.
|


| Installation |
| 1. |
Connect the audio unit connectors and cable. |
| 2. |
Install the audio unit. |
| 3. |
Install the center fascia panel. |
| 4. |
Install the cluster fascia panel. |
| 5. |
Install the crash pad passenger''s garnish. |
| 6. |
Connect the negative (-) battery terminal.
|
| Disassembly |
| 1. |
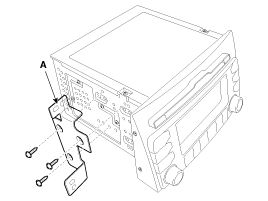
Loosen the screw (Left 3EA, Right 3EA) and remove the audio head unit mounting bracket (A).
|
| 2. |
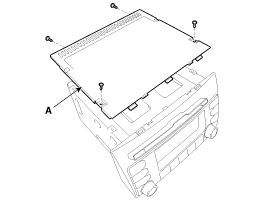
When separate the CD rom drive, if necessary, remove the top cover (A) after loosening the screws (4EA).
|
| 3. |
After loosening the screws, remove the CD rom drive(B).
|
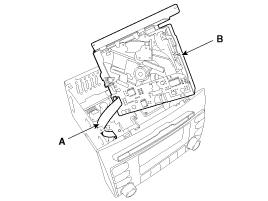
 Audio Unit: Components and Components Location
Components
Connector Pin Information
No.Connector AConnector B1Speaker RL (+)MM CAN HIGH 2Speaker FL (+)-3Speaker FR (+)-4Speaker RR (+)Steering Remote5--6-USB D (+)7-USB/iPOD VDD8Illuminat ...
 Speakers: Repair procedures
Inspection
1.
Troubleshooting for Speaker
(1)
Basic inspection of speaker
Inspect the sound from speaker after verifying that the
speaker mounting screws are removed and the wiring connector ...
Other Information:
4WD ECU: Schematic Diagrams
Circuit Diagram
4WD ECU Connector
PinFunction1Oil pressure motor A2Oil pressure motor B3Lock mode switch4-5Input sensor signal(+)6-7CAN communication line (High)8CAN communication line (Low)9- ...
Compressor: Components and Components Location
Components
1. Bolt2. Disc & Hub Assembly 3. Retainer Ring (Pulley)4. Pulley5. Retainer Ring (Field coil)6. Field Coil7. Compressor Assembly
...
Categories
- Home
- Kia Sportage QL (2015-2019) Owners Manual
- Kia Sportage QL (2015-2019) Service Manual
- Kia Sportage SL 2010-2016 Owners Manual
- Kia Sportage SL 2010-2016 Service Manual

Copyright © www.kispmanual.com 2014-2026