 Kia Sportage: Front Strut Assembly: Repair procedures
Third generation SL (2010ŌĆō2016) / Kia Sportage SL Service & Repair Manual / Suspension System / Front Suspension System / Front Strut Assembly: Repair procedures
| Replacement |
| 1. |
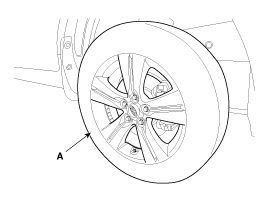
Remove the front wheel & tire.
|

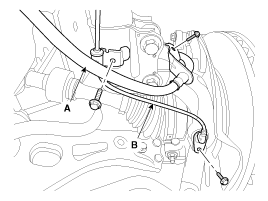
| 2. |
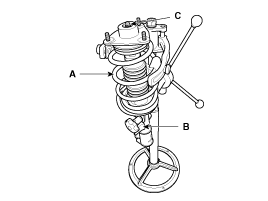
Remove the brake hose (A) & wheel speed sensor bracket (B) from the front strut assembly by loosening mounting bolts.
|
| 3. |
Disconnect the stabilizer link (B) from the front strut assembly (A) after loosening the nut.
|
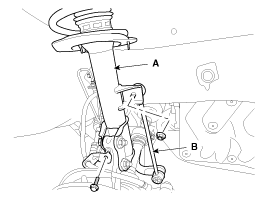
| 4. |
Disconnect the front strut assembly (A) with the knuckle by loosening the bolt & nut.
|

| 5. |
Remove the cowl top cover.
Refer to the Body group - Cowl top cover |
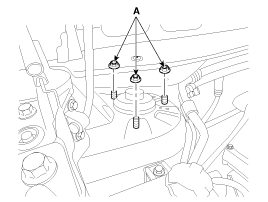
| 6. |
Remove the front strut assembly and then loosen the strut mounting nuts (A).
|
| 7. |
Installation is the reverse of removal. |
| Disassembly |
| 1. |
Using the special tool (09546-26000), compress the coil spring (A).
|
| 2. |
Remove the self-locking nut (C) from the strut assembly (B). |
| 3. |
Remove the insulator, spring seat, coil spring and dust cover from the strut assembly. |
| 4. |
Reassembly is the reverse of the disassembly. |
| Inspection |
| 1. |
Check the strut bearing for wear and damage. |
| 2. |
Check the spring upper and lower seat for damage and deterioration. |
| 3. |
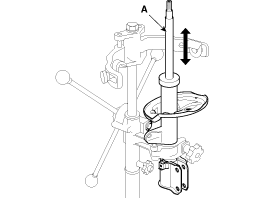
Compress and extend the piston rod (A) and check that there is no abnormal resistance or unusual sound during operation.
|
Disposal
| 1. |
Fully extend the piston rod. |
| 2. |
Drill a hole on the A section to remove gas from the cylinder.
|
 Front Strut Assembly: Components and Components Location
Components
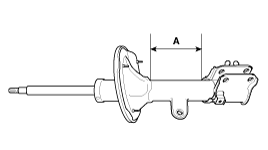
1. Strut assembly2. Insulator3. Bearing4. Spring upper pad5. Spring6. Dust cover7. Spring lower pad
...
 Front Lower Arm: Repair procedures
Replacement
1.
Remove the front wheel & tire.
Tightening torque :
88.3 ~ 07.9N.m (9.0 ~ 11.0kgf.m, 65.1 ~ 79.6lb-ft)
Be careful not to damage to the hub bo ...
Other Information:
Manifold Absolute Pressure Sensor (MAPS): Repair procedures
Inspection
1.
Connect the GDS on the Data Link Connector (DLC).
2.
Measure the output voltage of the MAPS at idle and IG ON.
Specification: Refer to "Specification"
Removal
1.
Tur ...
Tire maintenance
In addition to proper inflation, correct wheel alignment helps to decrease tire
wear. If you find a tire is worn unevenly, have your dealer check the wheel alignment.
When you have new tires instal ...
Categories
- Home
- Kia Sportage QL (2015-2019) Owners Manual
- Kia Sportage QL (2015-2019) Service Manual
- Kia Sportage SL 2010-2016 Owners Manual
- Kia Sportage SL 2010-2016 Service Manual

Copyright ® www.kispmanual.com 2014-2026