 Kia Sportage: Rear Driveshaft: Repair procedures
Third generation SL (2010ŌĆō2016) / Kia Sportage SL Service & Repair Manual / Driveshaft and axle / Rear Driveshaft Assembly / Rear Driveshaft: Repair procedures
| Replacement |
| 1. |
Loosen the wheel nuts slightly.
Raise the vehicle, and make sure it is securely supported. |
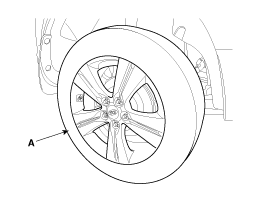
| 2. |
Remove the rear wheel and tire (A) from rear hub.
|

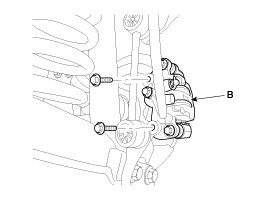
| 3. |
Remove the brake caliper mounting bolts , and then hold the brake caliper assembly (B) with wire.
|
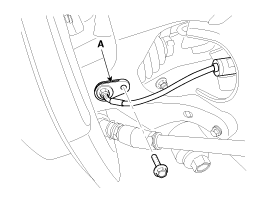
| 4. |
Remove the wheel speed sensor (A), from the knuckle.
|
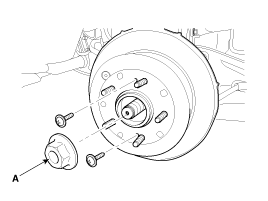
| 5. |
Remove castle nut (A) from the rear hub.
|
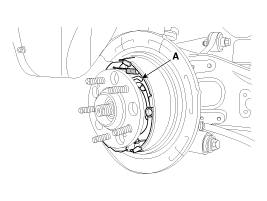
| 6. |
Remove the rear brake lining assembly (A). (Refer to BR group - Parking brake system)
|
| 7. |
Remove the parking brake cable (B) from the brake shoe (A).
|
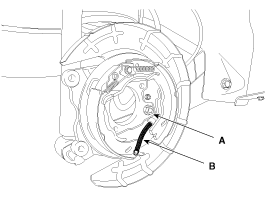
| 8. |
Remove the parking brake cable retaining (B), from the parking brake cable (A).
|
| 9. |
Remove the assist arm (A) from the rear axle carrier.
|

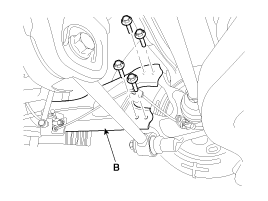
| 10. |
Remove the trailing arm (B) from the rear axle carrier.
|
| 11. |
Remove the upper arm (A) from the rear axle carrier.
|
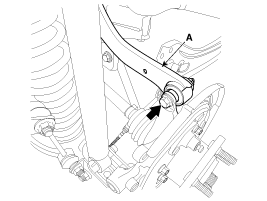
| 12. |
Push the rear axle carrier outward and separate the driveshaft (A) from the axle hub.
|
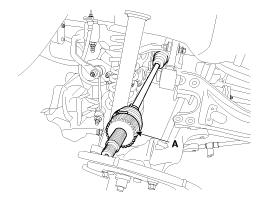
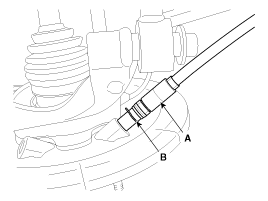
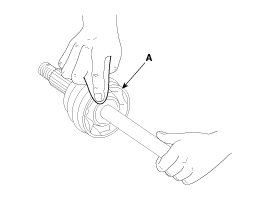
| 13. |
Insert a pry bar (A) between the differential case and joint case, and separate the driveshaft (B) from the differential case.
|
| Inspection |
| 1. |
Check the driveshaft boots for damage and deterioration. |
| 2. |
Check the ball joint for wear and damage. |
| 3. |
Check the splines for wear and damage.
|
| 4. |
Check the driveshaft for cracks and wears. |
| 5. |
Check the TJ outer race, inner race, cage and balls for rust or damage. |
| 6. |
Check for water, foreign matter, or rust in the BJ boot.
|
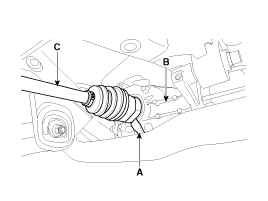
| Disassembly |
|
| 1. |
Remove the TJ boot bands and pull the TJ boot from the TJ outer race.
|
| 2. |
Pull out the driveshaft from the TJ outer race. |
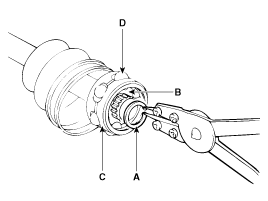
| 3. |
Remove the snap ring (A) and take out the inner race (B), cage (C) and balls (D) as an assembly.
|
| 4. |
Clean the inner race, cage and balls without disassembling. |
| 5. |
Remove the BJ boot bands and pull out the TJ boot and BJ boot.
|
| Reassembly |
| 1. |
Wrap tape around the driveshaft splines (TJ side ) to prevent damage to the boots. |
| 2. |
Apply grease to the driveshaft and install the boots. |
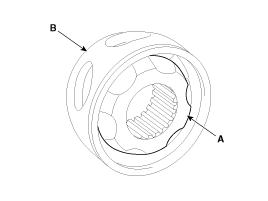
| 3. |
Apply the specified grease to the inner race (A) and cage (B). Install the cage (B) so that it is offset on the race as shown.
|
| 4. |
Apply the specified grease to the cage and fit the balls into the cage. |
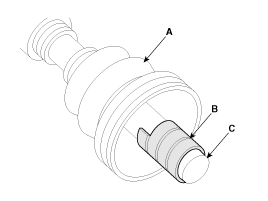
| 5. |
Position the chamfered side (A) as shown in the illustration.
Install the inner race on the driveshaft(B), and then the snap ring.
|
| 6. |
Apply the specified grease to the outer race and install the BJ outer race onto the driveshaft. |
| 7. |
Apply the specified grease into the TJ boot and install the boot with a clip. |
| 8. |
Tighten the TJ boot bands. |
| 9. |
Add the specified grease to the BJ as much as wiped away at inspection. |
| 10. |
Install the boots. |
| 11. |
Tighten the BJ boot bands. |
| 12. |
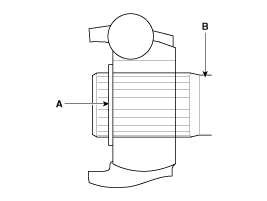
To control the air in the TJ boot, keep the specified distance between the boot bands when they are tightened.
|
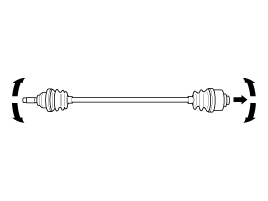
 Rear Driveshaft: Components and Components Location
Component location
1. Coupling2. Sub frame3. Assist arm4. Lower arm5. Upper arm6. Trailing arm7. Coil spring8. Shock absorber9. Stabilizer10. Drive shaft11. Differential carrier assembly
Compone ...

Other Information:
Intake Actuator: Description and Operation
Description
1.
The intake actuator is located at the blower unit.
2.
It regulates the intake door by signal from control unit.
3.
Pressing the intake selection switch will shift between re ...
Repair procedures
Component Replacement After Deployment
Before doing any SRS repairs, use the GDS Pro to check for
DTCs. Refer to the Diagnostic Trouble Code list for repairing of the ...
Categories
- Home
- Kia Sportage QL (2015-2019) Owners Manual
- Kia Sportage QL (2015-2019) Service Manual
- Kia Sportage SL 2010-2016 Owners Manual
- Kia Sportage SL 2010-2016 Service Manual

Copyright ® www.kispmanual.com 2014-2026