 Kia Sportage: Front Driveshaft: Repair procedures
Third generation SL (2010ŌĆō2016) / Kia Sportage SL Service & Repair Manual / Driveshaft and axle / Driveshaft Assembly / Front Driveshaft: Repair procedures
| Replacement |
| 1. |
Loosen the wheel nuts slightly.
Raise the vehicle, and make sure it is securely supported. |
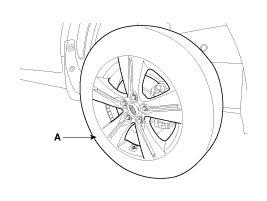
| 2. |
Remove the front wheel and tire (A) from front hub.
|

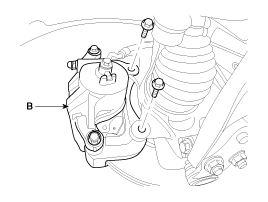
| 3. |
Remove the brake caliper mounting bolts, and then hold the brake caliper assembly (B) with wire.
|
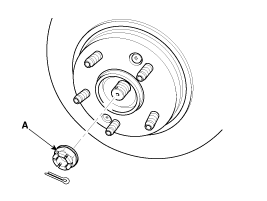
| 4. |
Remove castle nut (A) from the front hub.
|
| 5. |
Remove the brake hose (A) and wheel speed sensor (B).
|

| 6. |
Remove the tie rod end ball joint(C) from the knuckle.
|
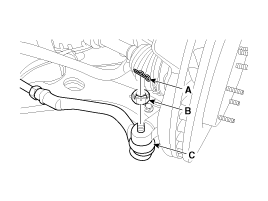
| 7. |
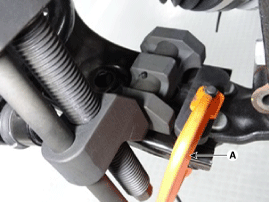
Remove the lower arm (A) mounting bolt from the knuckle.
|
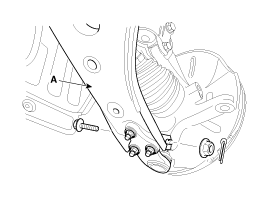
| 8. |
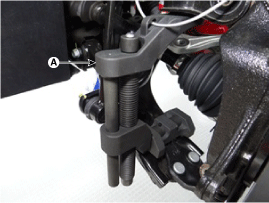
Remove the front lower arm from the front knuckle using the SST (0K545-A9100).
|


| 9. |
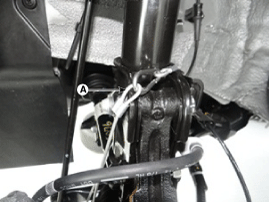
Disconnect the drive shaft end (A) from the knuckle.
|

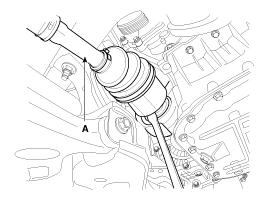
| 10. |
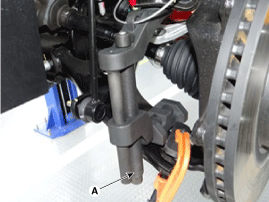
Remove the driveshaft assembly (A) from the inner shaft.
|
| 11. |
Remove the inner shaft mounting bolts and then disconnect the inner shaft (A).
|
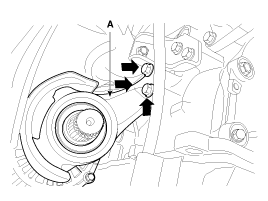
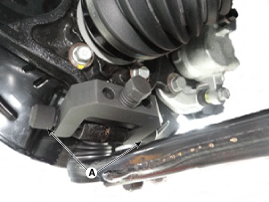
| 12. |
Insert a pry bar (A) between the transaxle case and joint case , and separate the driveshaft (B) from the transaxle case.
|

| 13. |
Install in the reverse order of removal.
|
| Inspection |
| 1. |
Check the driveshaft boots for damage and deterioration. |
| 2. |
Check the ball joint for wear and damage. |
| 3. |
Check the splines for wear and damage. |
| 4. |
Check the dynamic damper for cracks, wear and position.
|
| 5. |
Check the driveshaft for cracks and wears. |
| Disassembly |
|
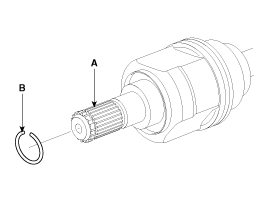
| 1. |
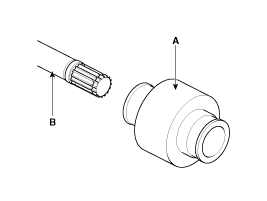
Remove the circlip (B) from driveshaft splines (A) of the transaxle side VTJ case.
|
| 2. |
Remove the both boot clamps from the transaxle side VTJ case.
Using a flat-tipped (-) screwdriver, remove the both clamps of the
transaxle side.
|
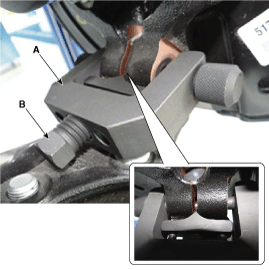
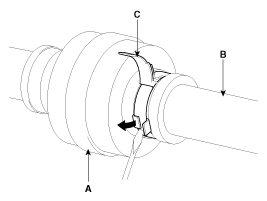
| 3. |
Pull out the boot from the transaxle side joint (VTJ). |
| 4. |
While dividing joint boot (A) of the transaxle side, wipe the grease in VTJ case (B) and collect them respectively.
|
| 5. |
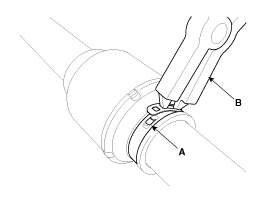
Using a snap ring plier or flat-tipped (-) screwdriver, remove the circlip (A).
|
| 6. |
Clean the spider assembly. |
| 7. |
Remove the boot (A) of the transaxle side joint (VTJ).
|
| 8. |
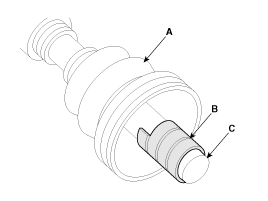
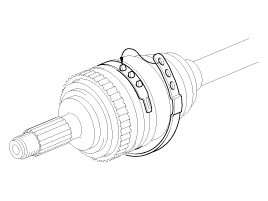
Using a plier or flat-tipped (-) screwdriver, remove the clamp (B) of the dynamic damper (A).
|
| 9. |
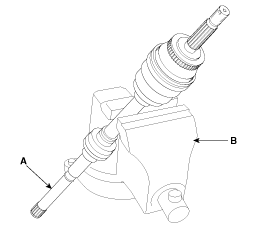
Fix the driveshaft (A) with a vice (B) as illustrated.
|
| 10. |
Apply soap powder on the shaft to prevent being damaged
between the shaft spline and the dynamic damper when the dynamic damper
is removed. |
| 11. |
Separate the dynamic damper (A) from the shaft (B) carefully.
|
| 12. |
Using a plier or flat-tipped (-) screwdriver, remove the clamp on the side of wheel.
|
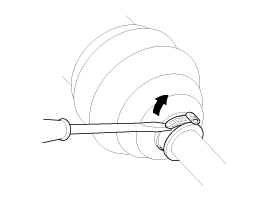
| 13. |
Pull out the joint (BJ) on the side of wheel into the transaxle direction. Be careful not to damage the boot. |
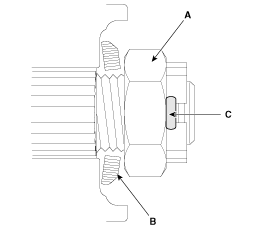
| Reassembly |
| 1. |
Wrap tape around the driveshaft splines (VTJ. side) to prevent damage to the boots. |
| 2. |
Apply grease to the driveshaft and install the BJ boots. |
| 3. |
Install the bands to both BJ boots.
|
| 4. |
To reassemble the dynamic damper (A), keeping the shaft (B)
in the straight line. Tighten the dynamic damper (A) with dynamic damper
band (C), as the illustration.
|
| 5. |
Install the VTJ boot bands and VTJ boot. |
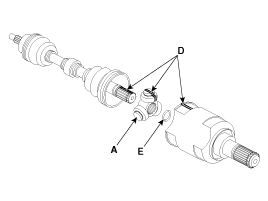
| 6. |
Install the spider assembly (A) and the circlip (E) to the spline (C) on the driveshaft.
At this time align the marks (D) each other.
|
| 7. |
Install the clip to the VTJ case (B). |
| 8. |
Add the specified grease to the VTJ as mush as wiped away at inspection. |
| 9. |
Install the VTJ boots. |
| 10. |
Install the bands to both VTJ boots. |
| 11. |
Using the SST(09495-3K000), secure the boot bands.
|
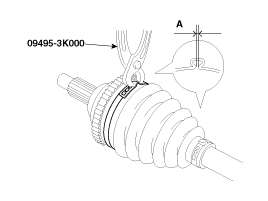
| 12. |
To control the air in the VTJ boot, keep the specified distance between the boot bands when they are tightened.
|

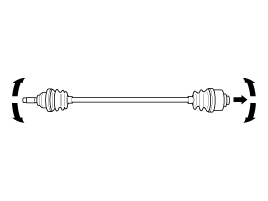
 Front Driveshaft: Components and Components Location
Components
1. Front driveshaft (LH)2. inner shaft3. Front driveshaft (RH)
1. Split pin2. Castle nut3. washer4. BJ assembly5. Clip A6. BJ boot band7. BJ boot8. Dynamic damper band9. Dynamic d ...

Other Information:
4WD ECU: Schematic Diagrams
Circuit Diagram
4WD ECU Connector
PinFunction1Oil pressure motor A2Oil pressure motor B3Lock mode switch4-5Input sensor signal(+)6-7CAN communication line (High)8CAN communication line (Low)9- ...
Fob Holder: Components and Components Location
Component
...
Categories
- Home
- Kia Sportage QL (2015-2019) Owners Manual
- Kia Sportage QL (2015-2019) Service Manual
- Kia Sportage SL 2010-2016 Owners Manual
- Kia Sportage SL 2010-2016 Service Manual

Copyright ® www.kispmanual.com 2014-2026